
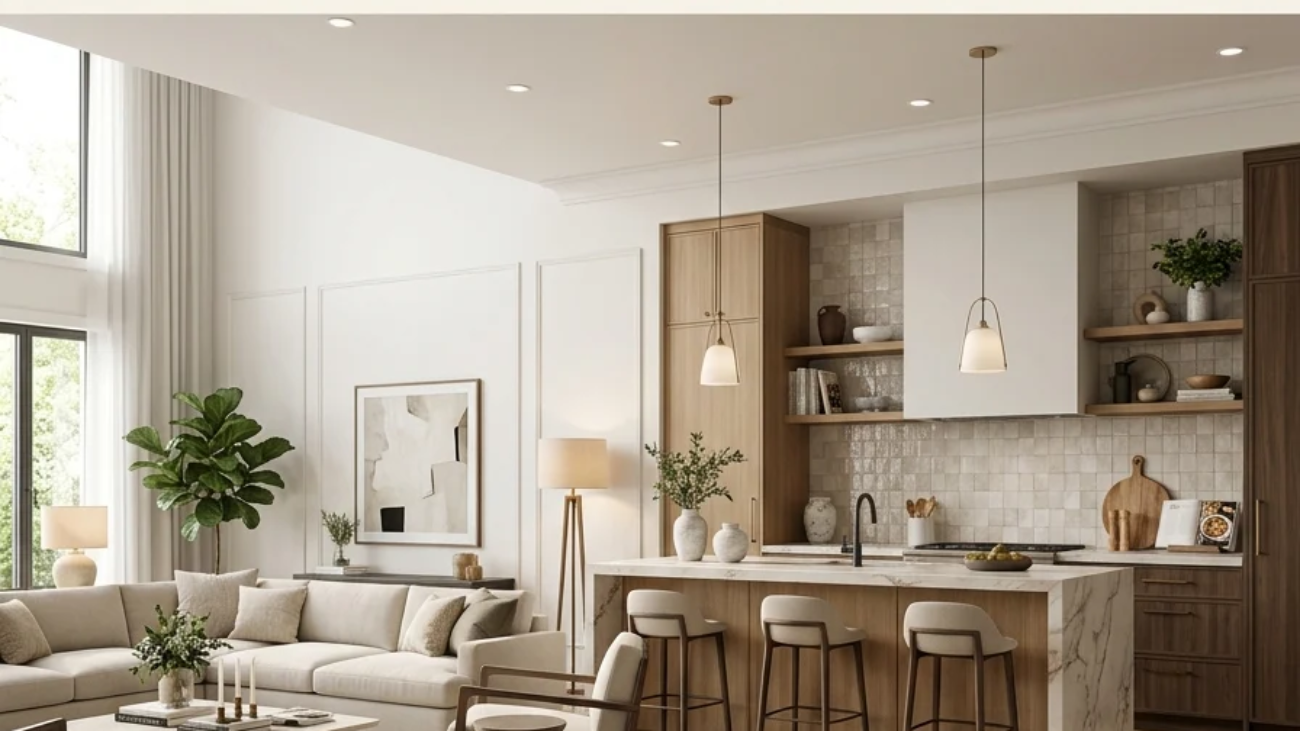
An open concept kitchen and living room design removes the wall between cooking and lounging spaces so both rooms function as one continuous space, unified by matching materials, flooring, and sightlines. This article gives you 15 open concept kitchen and living room ideas that work for full-wall removals, kitchen islands as room dividers, and homes still deciding how open is open enough.
Picture a Saturday morning where the person cooking breakfast never once has their back turned to the conversation happening on the sofa, where the smell of coffee drifts freely into a living room lit by the same warm pendant glow as the island above the stove. Open concept living has a specific kind of energy: the sound of one room reaches the other, light travels uninterrupted from window to window, and nobody standing at the stove misses what’s happening on the television or at the coffee table. It asks for confidence: one continuous floor, one coherent palette, furniture chosen to hold its own against a kitchen instead of hiding from it. Here are 15 ideas worth saving and stealing.
Why Open Concept Kitchen and Living Room Design Works So Well
Open concept design traces back to the mid-century American ranch home, when post-war architects began removing the formal parlor walls that had separated cooking from entertaining, treating the kitchen as a space worth being seen rather than hidden. The concept evolved through the 1990s and 2000s as the kitchen island became a genuine social hub rather than just a work surface, and today the style is defined less by literal wall removal and more by continuous sightlines and a shared material language between zones; a home can be functionally open even with a partial wall or a half-height divider still standing.
The material and color vocabulary centers on continuity. Wide-plank engineered white oak flooring, waterfall-edge quartz islands, matte black or unlacquered brass hardware, and natural stone or stone-look backsplashes repeat across both zones. Color stays warm and restrained: warm white, soft greige, sage green cabinetry, warm charcoal accents, rather than the high-contrast palettes that work in fully separated rooms.
Style at a Glance
| Element | Trait 1 | Trait 2 |
| Philosophy | Continuous sightlines over segmented rooms | Shared material language ties zones together |
| Materials | Waterfall quartz, wide-plank white oak, brass hardware | Boucle and linen upholstery, natural stone backsplash |
| Color Palette | Warm white, soft greige, sage green cabinetry | Warm charcoal, brass accents, terracotta highlights |
1. The Island as the Room’s Literal and Visual Anchor
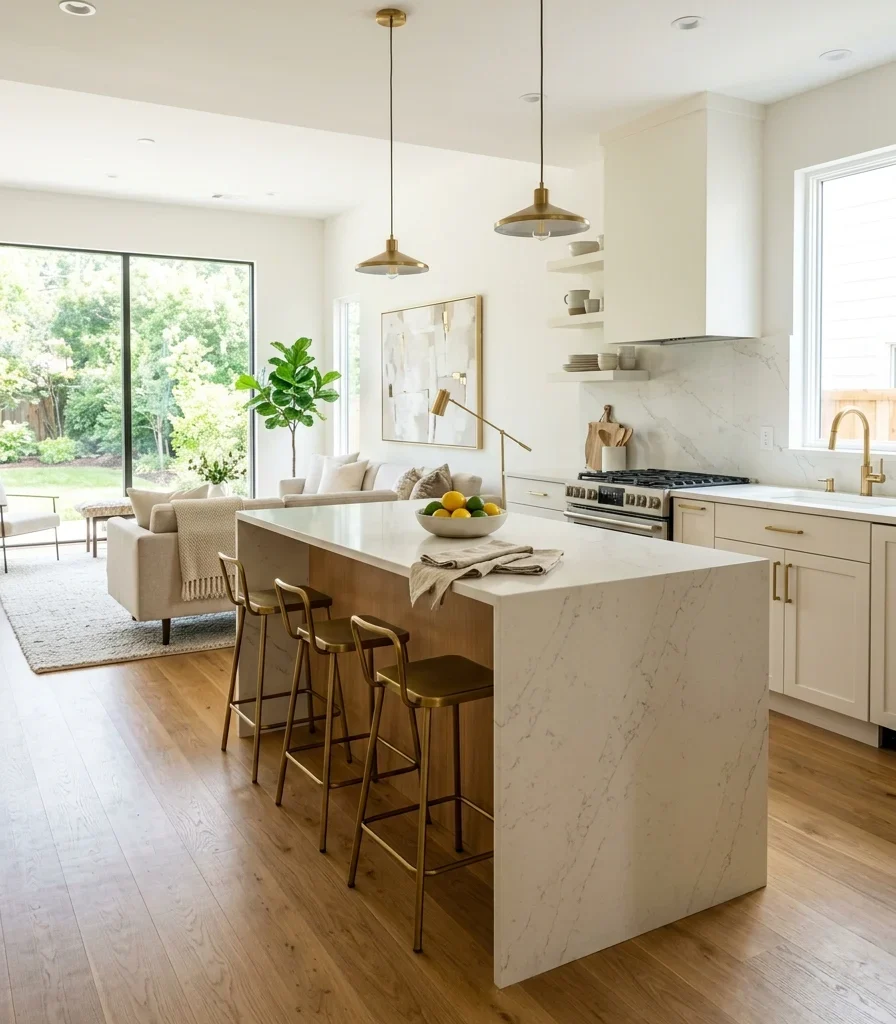
Vibe: Airy, a floor plan that lets one continuous room breathe instead of two competing ones.
Why it works: Positioning the island as the literal midpoint between the cooking wall and the seating area gives the open floor plan a visual anchor without adding a physical wall one definition through furniture placement rather than architecture. The island’s mass reads as a boundary marker even though sightlines stay completely open above and around it.
How to get it: Center the island roughly eight to ten feet from both the range wall and the sofa’s front edge, leaving a minimum 42-inch walkway on both sides so the space reads as one navigable room rather than two furniture arrangements competing for floor space.
💡 Quick Win: If a full island isn’t possible, a narrow console table or bar cart positioned at the same midpoint creates a lighter-weight version of the same zone marker.
Shop the Look
| Product |
| Waterfall-edge quartz island countertop overlay |
| Brass counter-height bar stool set of two |
| Wide-plank warm white oak flooring sample |
| Woven ceramic fruit bowl |
| Linen napkin set folded |
2. One Continuous Wide-Plank Floor Underfoot
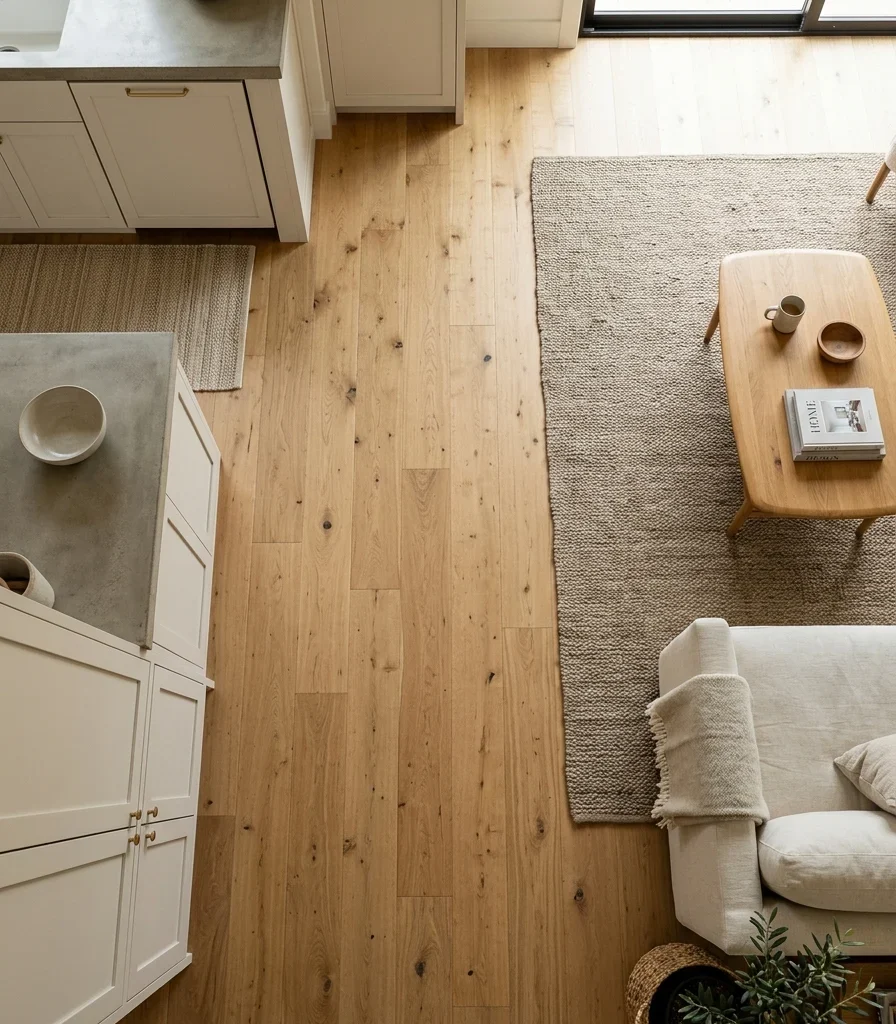
Vibe: Grounded floor that makes two rooms behave like one.
Why it works: A single flooring material run in one continuous plank direction from the kitchen through the living room eliminates the transition strip that visually chops an open floor plan into two separate rooms. Material continuity does more to unify an open concept space than paint color or furniture arrangement combined. Water-resistant engineered oak handles the kitchen’s spill exposure while matching the living room’s warmth exactly.
How to get it: Specify engineered white oak in a wide plank (7-9 inches) laid in the same direction throughout both zones, using a waterproof engineered core rather than solid wood directly around the kitchen work zone so one material choice satisfies both rooms’ different durability needs.
Shop the Look
| Product |
| Engineered white oak wide-plank flooring sample |
| Waterproof flooring underlayment roll |
| Jute area rug large neutral |
| Transition-free threshold strip matching finish |
| Natural wood floor cleaner safe finish |
3. A Single Wall Color Carried Through Both Zones
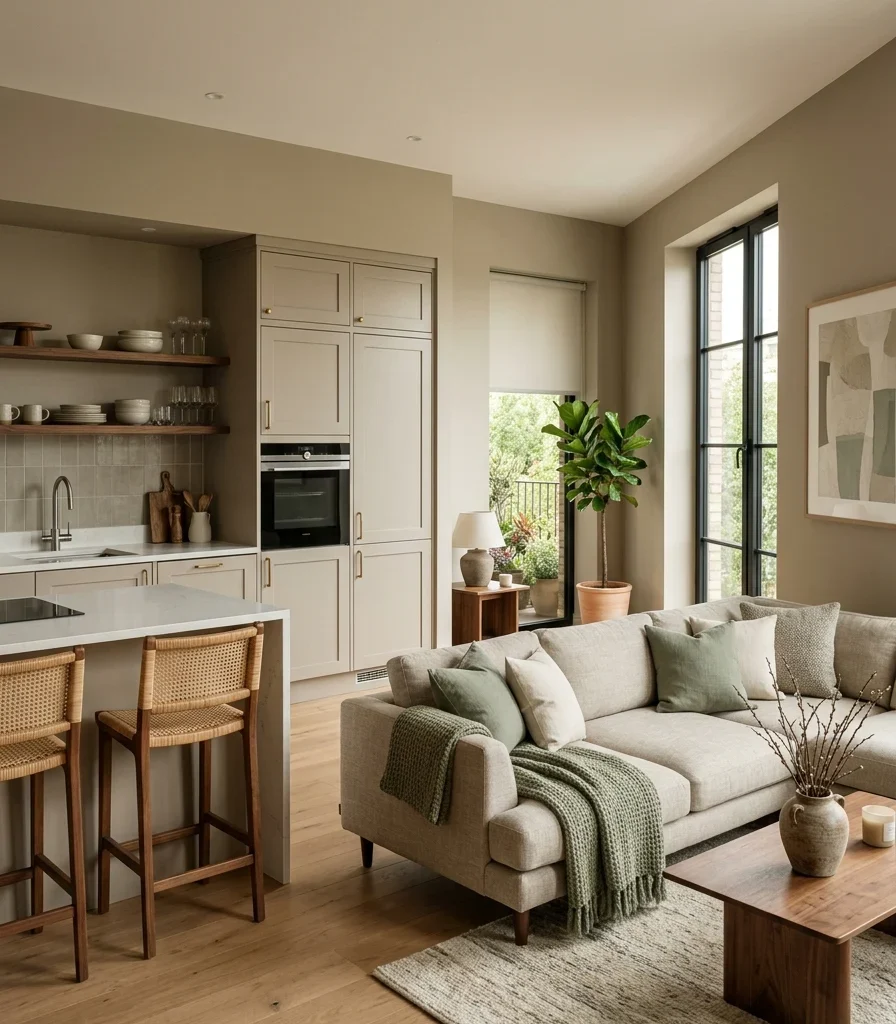
Vibe: Serene, a palette so consistent the eye never registers where one room ends.
Why it works: Painting the kitchen cabinetry and the living room walls in the same or a closely related undertone removes the visual seam where “kitchen” ends and “living room” begins; color continuity is the fastest way to make two functionally different rooms register as one. A shared warm undertone also keeps brass and wood tones from clashing across the open sightline.
How to get it: Choose one warm greige or warm white paint color and use it on every wall visible from the main sightline in both rooms, then let cabinetry, furniture, and accessories introduce the only color variation, keeping the architecture quiet so the eye reads one space.
💡 Quick Win: Test the same paint swatch in both rooms at different times of day before committing; kitchen light and living room light often differ enough to shift how identical paint reads.
Shop the Look
| Product |
| Warm greige interior wall paint sample set |
| Matte finish paint roller kit |
| Ceramic table vase warm white |
| Woven cotton throw blanket neutral |
| Walnut wood picture frame set |
4. A Pendant Cluster That Marks the Kitchen’s Edge
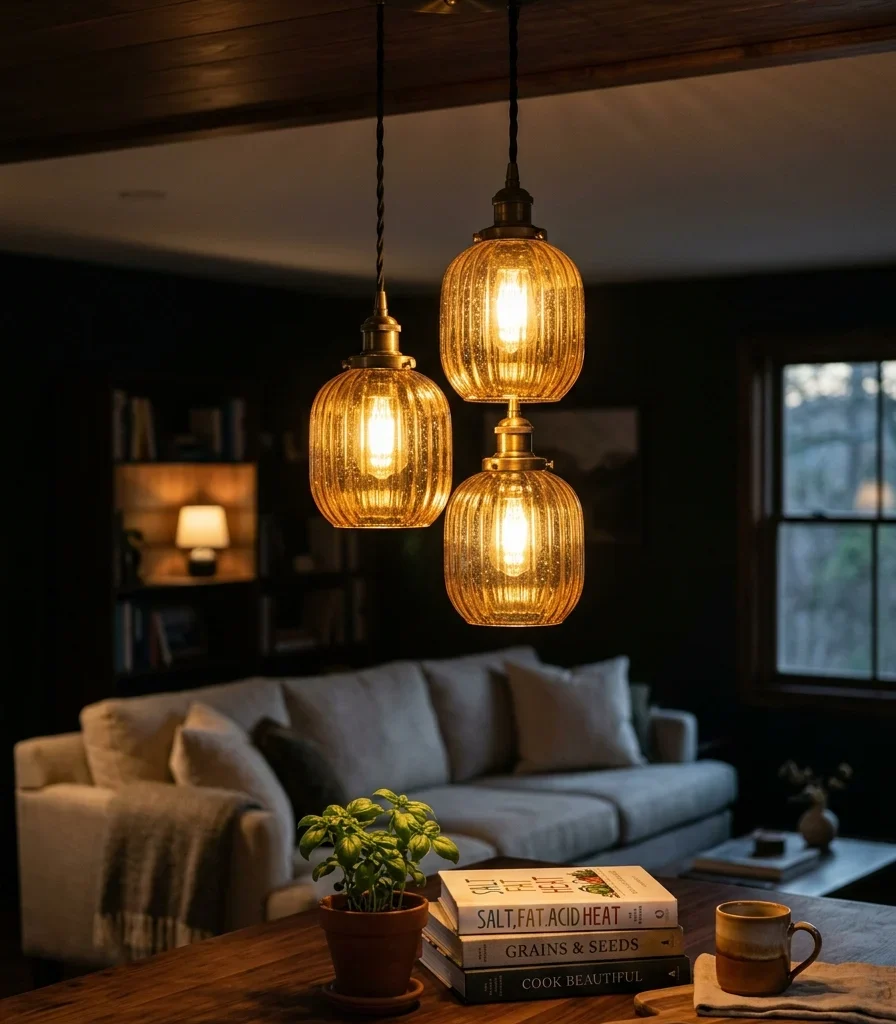
Vibe: Warm a pool of light that quietly announces where cooking happens.
Why it works: A cluster of pendant lights hung lower than the surrounding ceiling fixtures creates a light behavior boundary; the pool of warm light beneath the pendants signals “kitchen zone” even without a wall, while softer ambient lighting in the living room signals the shift to a different function. This layered approach lets one open room contain two distinct moods.
How to get it: Hang three pendants in a row above the island, spaced 24-30 inches apart and 30-36 inches above the counter surface, in a warm amber or smoked glass that reads warmer than the flush-mount or recessed lighting used in the living room ceiling.
Shop the Look
| Product |
| Amber glass pendant light set of three |
| Brass ceiling canopy kit |
| Small potted herb ceramic planter |
| Stacked cookbook set for styling |
| Dimmer switch kit for pendant lighting |
5. A Sofa Back Doing the Work of a Wall
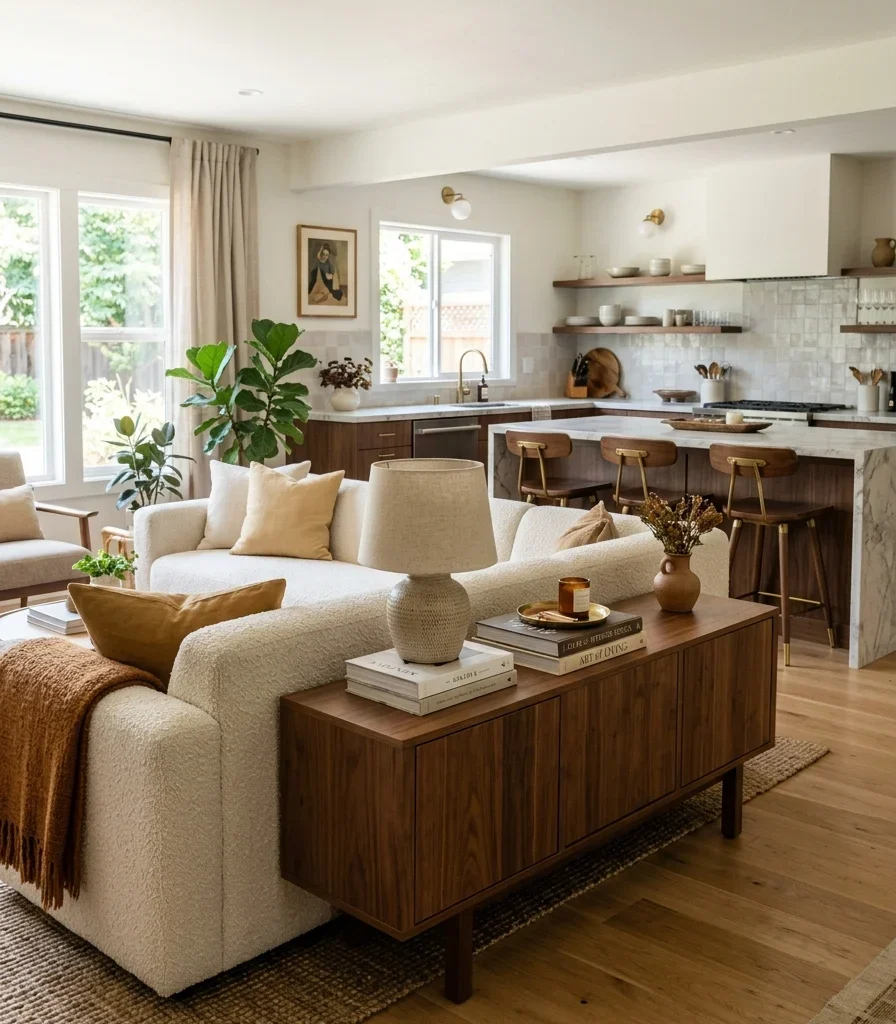
Vibe: Layered furniture that carries architectural weight without becoming architecture.
Why it works: Positioning a sofa with its back toward the kitchen, rather than against a wall, uses the piece itself as a soft spatial divider; furniture-as-boundary achieves the room-separating function of a wall without blocking sightlines or light. A console table placed behind the sofa, facing the kitchen, gives that boundary a second functional layer as a landing spot for keys or drinks.
How to get it: Choose a sofa with a back height no taller than 32 inches so it defines the zone without blocking sightlines to the television or the island, and place a slim console table (12-14 inches deep) directly behind it facing the kitchen.
💡 Quick Win: A bench-style ottoman behind the sofa works as a lighter-weight substitute for a full console table in especially tight layouts.
Shop the Look
| Product |
| Cream boucle low-back sofa |
| Walnut wood console table slim |
| Ceramic table lamp warm white shade |
| Woven storage basket for console |
| Low bench ottoman alternative |
6. A Stone Surface That Travels From Backsplash to Fireplace
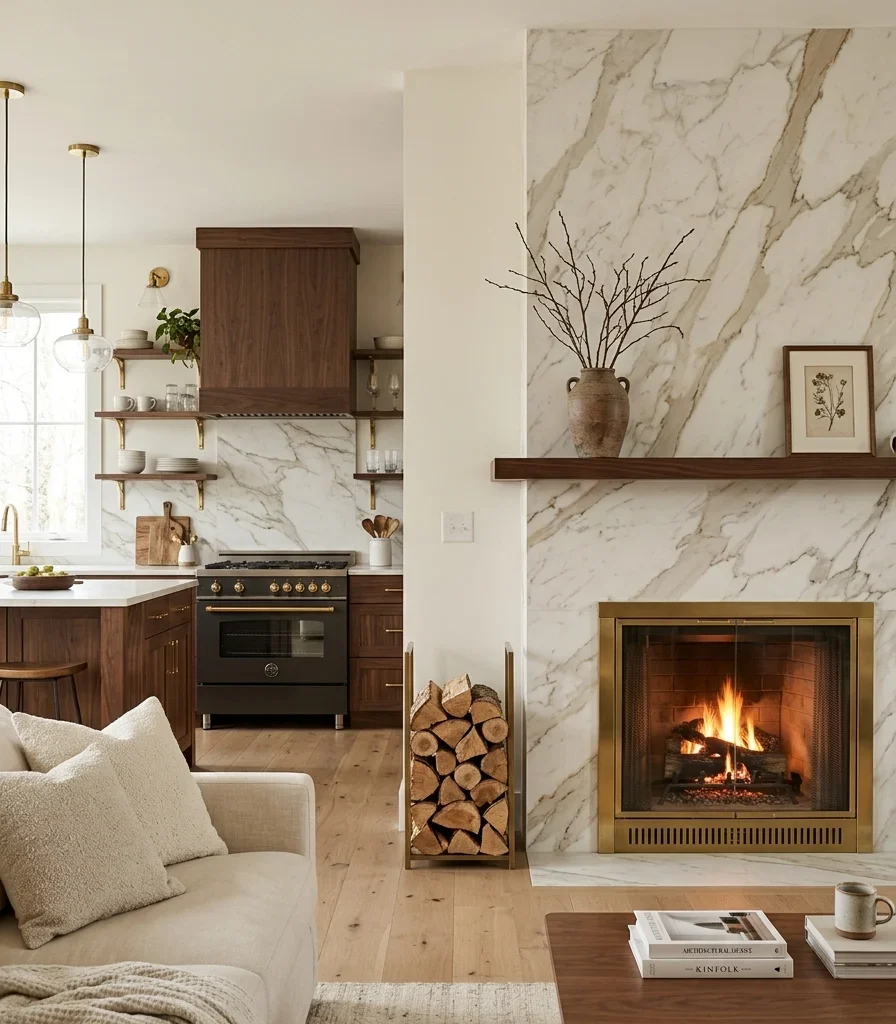
Vibe: Grounded, one material telling two ends of the room they belong together.
Why it works: Repeating one stone or stone-look material across two functionally different surfaces a kitchen backsplash and a living room fireplace surround creates a material echo that ties the two ends of an open room together even when they’re twenty feet apart. The eye recognizes the same veining pattern and registers it as intentional, connecting the spaces without needing a direct sightline association.
How to get it: Select one large-format marble-look porcelain slab tile and specify it for both the kitchen backsplash and the fireplace surround at the time of ordering, since dye lots vary between orders and matching them later is difficult once installation is complete.
Shop the Look
| Product |
| Large-format marble-look porcelain slab tile |
| Brass fireplace surround trim kit |
| Firewood log rack iron |
| Ceramic mantel vase warm white |
| Stone sealer for porcelain maintenance |
7. Two-Tone Cabinetry Echoed in a Living Room Accent Chair
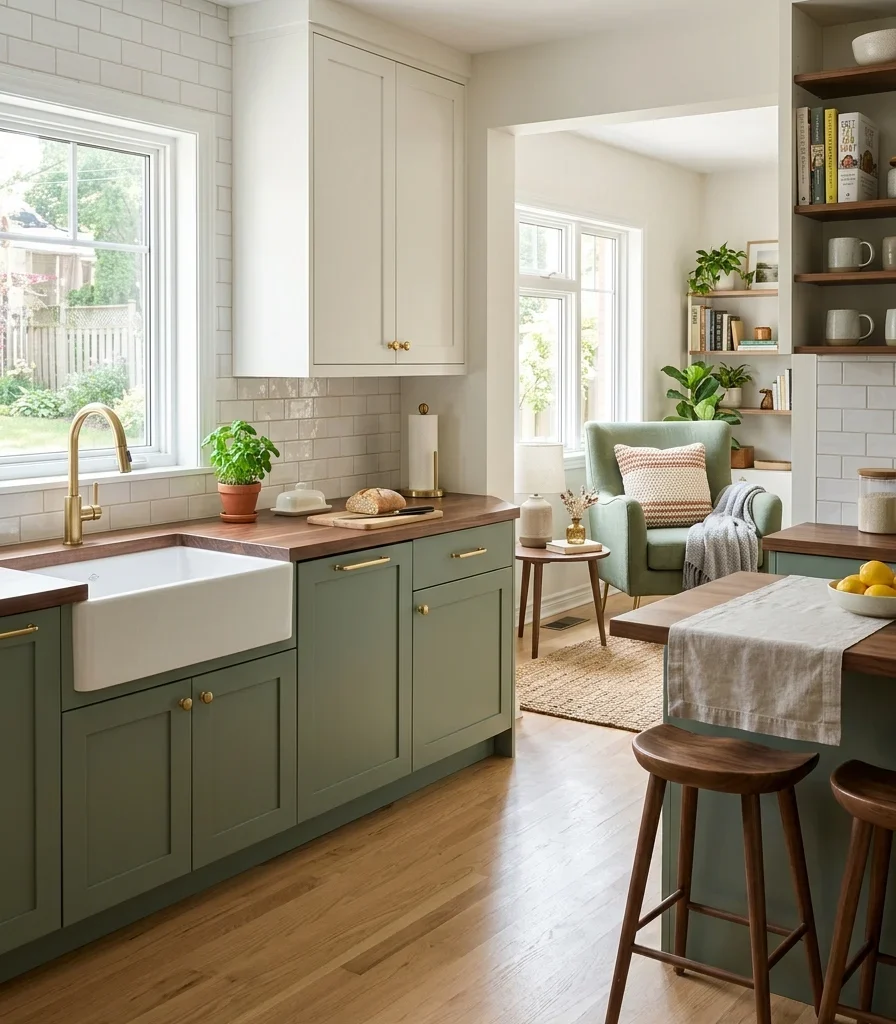
Vibe: Fresh, a single repeated color doing more work than a whole palette could.
Why it works: Repeating the kitchen’s lower cabinet color as a single upholstered piece in the living room, rather than scattering that color evenly across both rooms, creates color echo without color overload a restrained way to connect two zones through one deliberate repetition instead of matching everything. The sage tone reads as intentional connective tissue rather than a coincidental choice.
How to get it: Choose one accent piece in the living room an armchair, a pair of pillows, or a slim bench in the same paint-matched fabric tone as the kitchen’s lower cabinetry, and keep every other living room color neutral so that the single echo stays legible.
💡 Quick Win: Can’t reupholster? A single sage green throw pillow on an otherwise neutral sofa creates the same color-echo effect for under $40.
Shop the Look
| Product |
| Sage green accent armchair upholstered |
| Sage green throw pillow cover pair |
| Brass cabinet pull hardware set |
| Small potted plant ceramic pot |
| Woven cream throw blanket |
8. Open Shelving That Displays Both Kitchenware and Living Room Objects
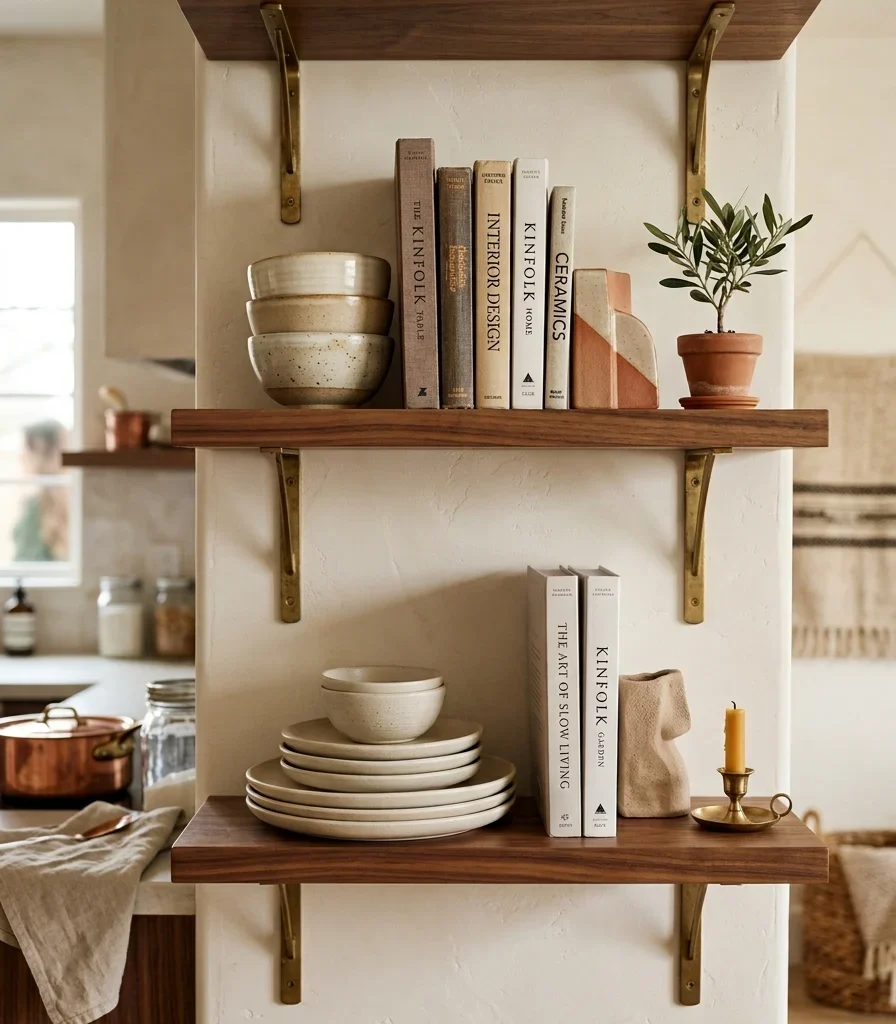
Vibe: Layered shelf that belongs to both rooms at once.
Why it works: Open shelving placed at the literal seam between kitchen and living room, styled with a deliberate mix of kitchen ceramics and living room objects, uses object juxtaposition to visually announce that this is shared territory rather than exclusively kitchen or living room space; a subtle way to make the room’s dual function feel intentional rather than accidental.
How to get it: Mount two or three walnut shelves on brass brackets at the transition point between zones, and style each shelf with roughly 60% kitchen-adjacent objects (bowls, a cutting board, glassware) and 40% living-room objects (books, a small sculpture, a framed photo) so the mix reads balanced rather than random.
Shop the Look
| Product |
| Walnut open wall shelf set of three |
| Brass shelf bracket hardware |
| Stacked ceramic bowl set neutral |
| Small ceramic sculpture object |
| Coffee table book stack neutral covers |
9. A Kitchen Walkway Wide Enough to Double as a Living Room Path
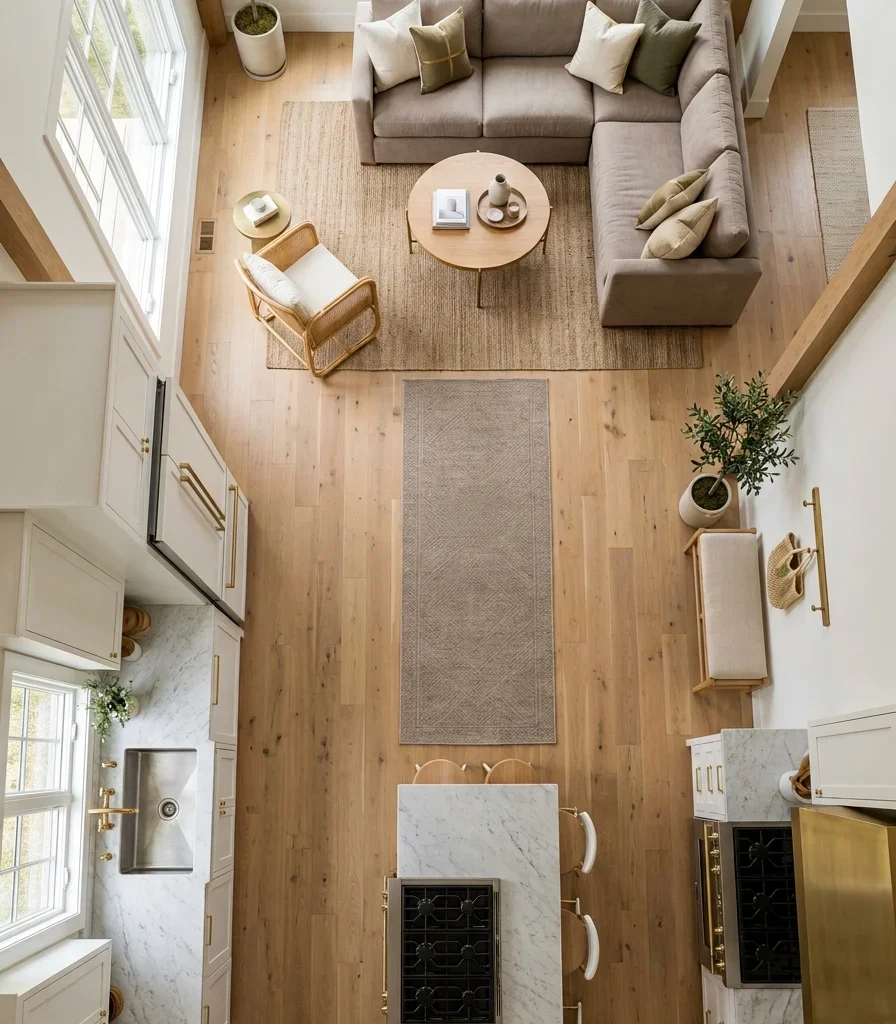
Vibe: Airy room that moves as easily as it looks.
Why it works: Traffic flow is the layout consideration most open concept plans get wrong first: when the path between the kitchen’s work triangle and the living room’s seating area narrows below 36 inches, the room stops feeling open regardless of how few walls exist. Keeping a clear, consistent walkway width is what makes an open floor plan actually function as one connected space rather than an obstacle course.
How to get it: Map the direct path between the refrigerator, the sink, and the sofa before placing any furniture, and keep that path a minimum of 42 inches wide at every point, pulling coffee tables and console tables at least that distance back from the natural walking line.
💡 Quick Win: Use painter’s tape on the floor to mark out the 42-inch path before buying furniture; it’s the fastest way to catch a layout mistake before it becomes an expensive one.
Shop the Look
| Product |
| Runner rug narrow hallway style |
| Small entry bench slim profile |
| Furniture floor protectors for rearranging |
| Low-profile coffee table space-saving |
| Floor tape measure kit for planning |
10. Exposed Wood Beams That Run Overhead Through Both Rooms
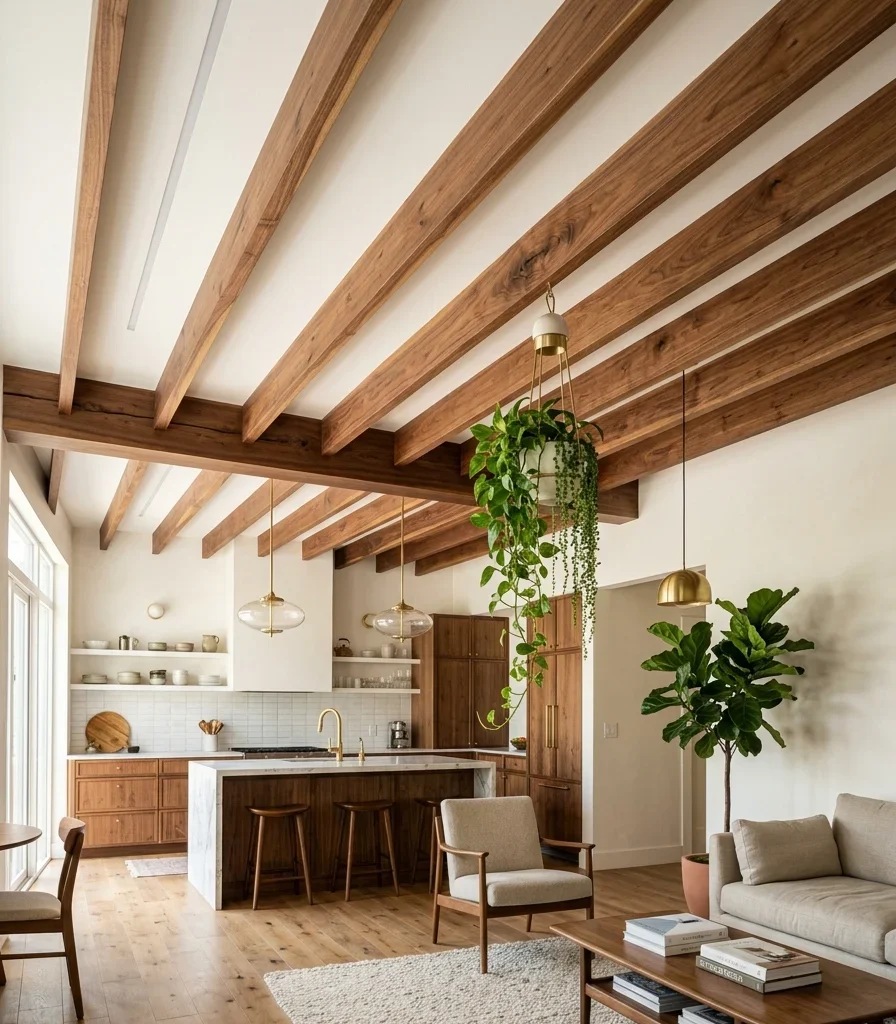
Vibe: Grounded and an overhead line that stitches the room together from above.
Why it works: Exposed structural or decorative beams running continuously from the kitchen ceiling into the living room ceiling create an overhead sightline that visually stitches the two zones together from above, working the same unifying trick as continuous flooring at eye level’s opposite extreme. The material warmth of walnut against a white ceiling also breaks up an otherwise flat expanse in a large open room.
How to get it: Install hollow decorative walnut beam sleeves spaced evenly across the ceiling’s full span, running perpendicular to the kitchen island’s direction for the strongest visual line, and keep the ceiling paint between them a crisp warm white to maximize the beam’s contrast.
Shop the Look
| Product |
| Decorative walnut beam sleeve set |
| Ceiling mounting hardware kit for beams |
| Warm white ceiling paint sample |
| Integrated pendant light track for beams |
| Hanging trailing plant in ceramic pot |
11. Three Layers of Light That Shift the Room’s Mood by Time of Day
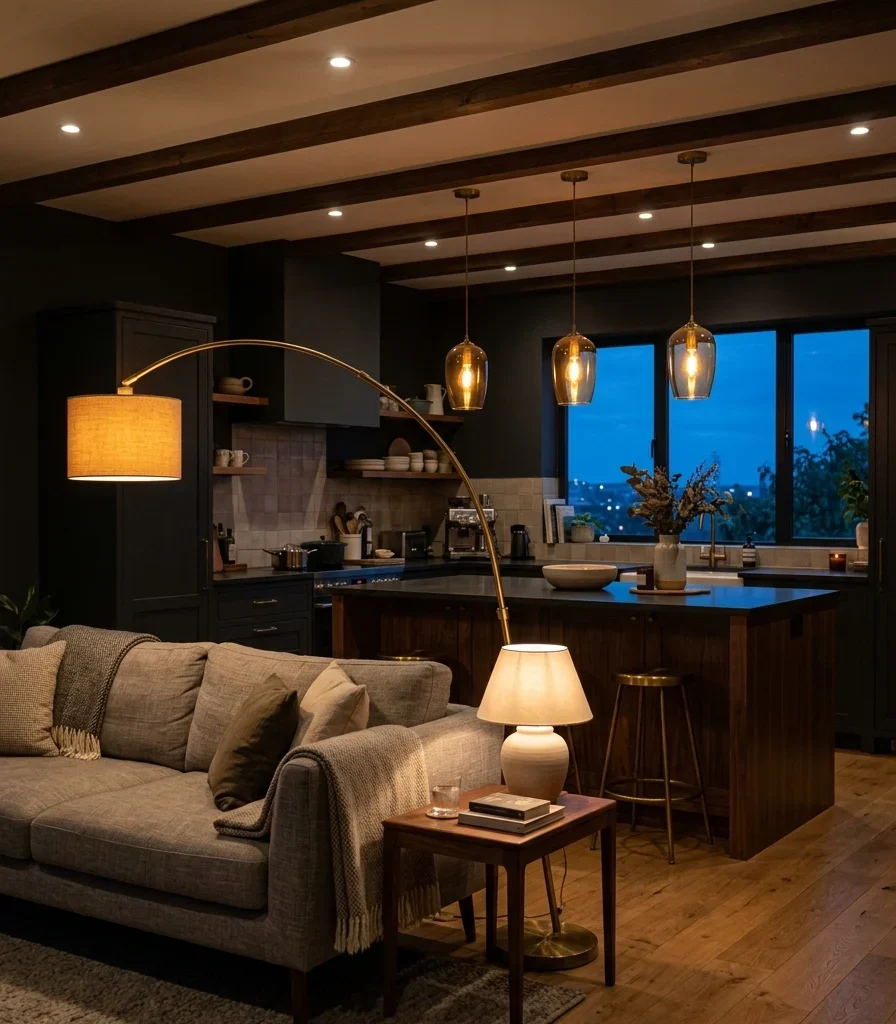
Via moodydy, a room that knows how to feel like two, depending on the hour.
Why it works: An open concept room without distinct lighting layers reads flat at night, since one bank of overhead lights illuminates the whole space evenly and erases the sense of separate zones that walls used to provide. Layering task lighting over the island, ambient recessed lighting throughout, and a floor or table lamp in the living room recreates that zone distinction through light intensity and color temperature rather than architecture.
How to get it: Put the kitchen’s recessed lighting and pendant lighting on separate dimmer circuits from the living room’s fixtures, and set the living room’s floor lamp to a warmer color temperature (2700K) than the kitchen’s task lighting (3000K) so the two zones feel distinct even at full brightness.
Shop the Look
| Product |
| Dimmer switch kit dual circuit |
| Brass floor lamp living room |
| Warm 2700K LED bulb set |
| Ceramic table lamp neutral shade |
| Recessed lighting trim kit brass finish |
12. An Area Rug That Draws the Living Room’s Boundary on the Floor
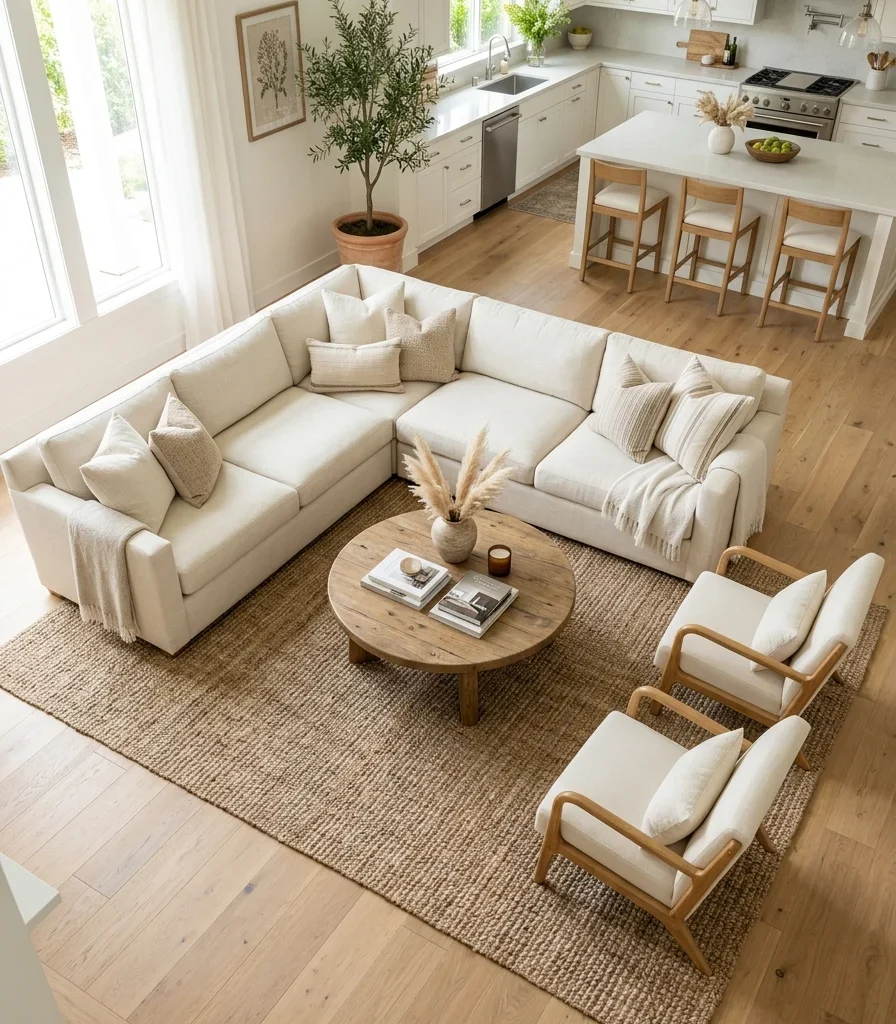
Vibe: Airy, a boundary drawn on the floor instead of built in the air.
Why it works: A large area rug functions as a floor-level boundary marker in an open plan, using the material change underfoot and flooring transitioning to a woven rug to define where the living room zone begins without a wall or a step change in elevation. The rug must be large enough that all the seating furniture’s front legs rest on it, or the boundary reads as too small for the furniture it’s meant to anchor.
How to get it: Size the rug so at minimum the front two legs of every seating piece sit on it, typically requiring an 8×10 or 9×12 rug for a standard living room grouping, and choose a natural fiber like jute or wool that reads as intentional against the kitchen’s hard flooring.
Shop the Look
| Product |
| Taupe jute area rug 9×12 |
| Cream boucle armchair pair |
| Low walnut coffee table centered |
| Neutral throw pillow cover set |
| Rug pad non-slip for hard floors |
13. A Statement Range Hood That Becomes the Room’s Color Anchor
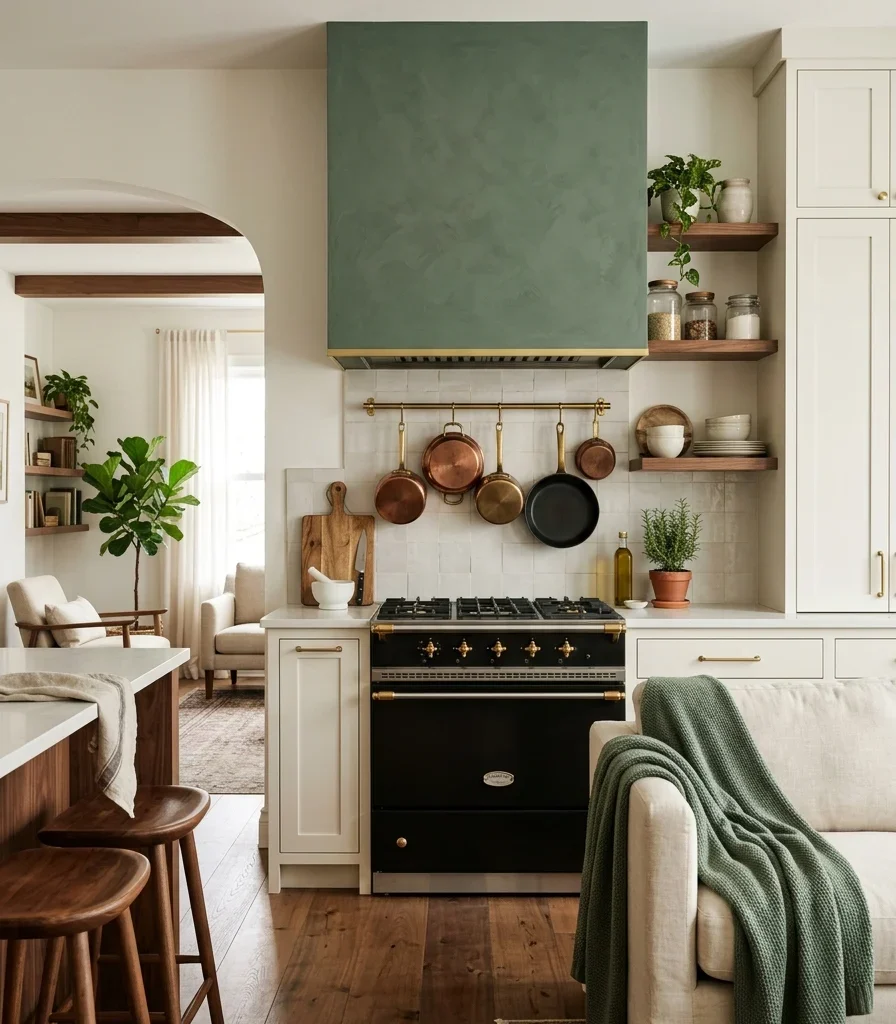
Vibe: Grounded one confident color statement instead of a dozen timid ones.
Why it works: A single saturated color concentrated on one architectural element he range hood rather than spread across the whole kitchen gives an open concept room one confident color statement, a principle of controlled color concentration. Because the hood is visible from nearly every point in the living room in an open layout, that one color choice does the work of anchoring the entire room’s palette.
How to get it: Finish the range hood in a plaster or painted deep sage green while keeping surrounding cabinetry in warm white, then repeat that exact sage tone in exactly one living room textile, a row blanket or a single pillow – the color reads as a deliberate anchor.
💡 Quick Win: A range hood color change is one of the highest-impact, lowest-square-footage paint projects in the whole open concept space in a single weekend and under a gallon of paint.
Shop the Look
| Product |
| Plaster-finish paint for range hood |
| Brass range hood trim strip |
| Sage green throw blanket matching |
| Hanging brass cookware rail |
| Painter’s tape for hood edge lines |
14. One Long Art Piece That Spans the Sightline Between Rooms
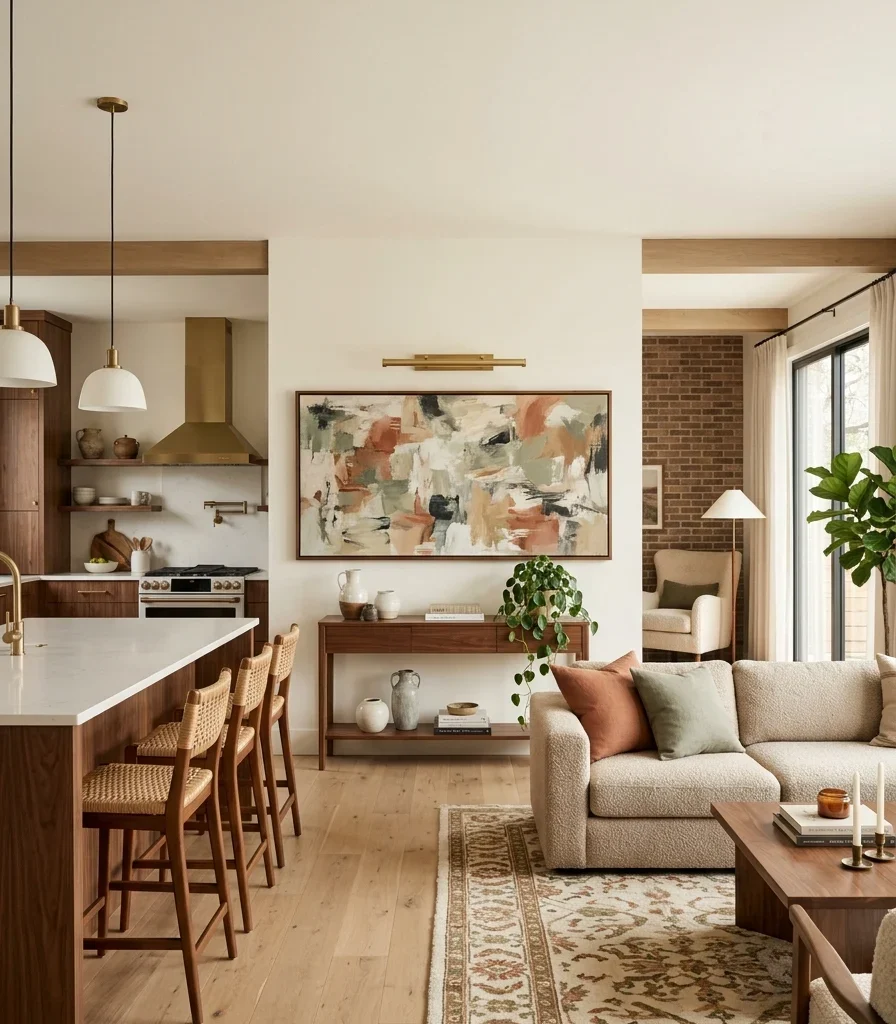
Vibe: Layered, single focal point both rooms are allowed to share.
Why it works: One large piece of art hung where it’s visible from both the kitchen and the living room gives the eye a single shared focal point that both zones reference, rather than each room needing its own separate wall decor, reducing visual competition and reinforcing that the space functions as one room with two purposes. A horizontal format works better here than vertical, echoing the room’s own wide, low sightline.
How to get it: Choose a horizontal art piece at least 48 inches wide, hang it on the wall most visible from the kitchen’s main work zone at 57 inches to the piece’s center, and add a slim picture light above it so it stays a clear focal point even as the room’s ambient lighting shifts to evening mode.
Shop the Look
| Product |
| Large horizontal abstract canvas art |
| Walnut wood picture frame wide format |
| Brass picture light fixture |
| Slim console table beneath art |
| Small ceramic object for console styling |
15. Small-Space Tricks for a Compact Open Kitchen and Living Room
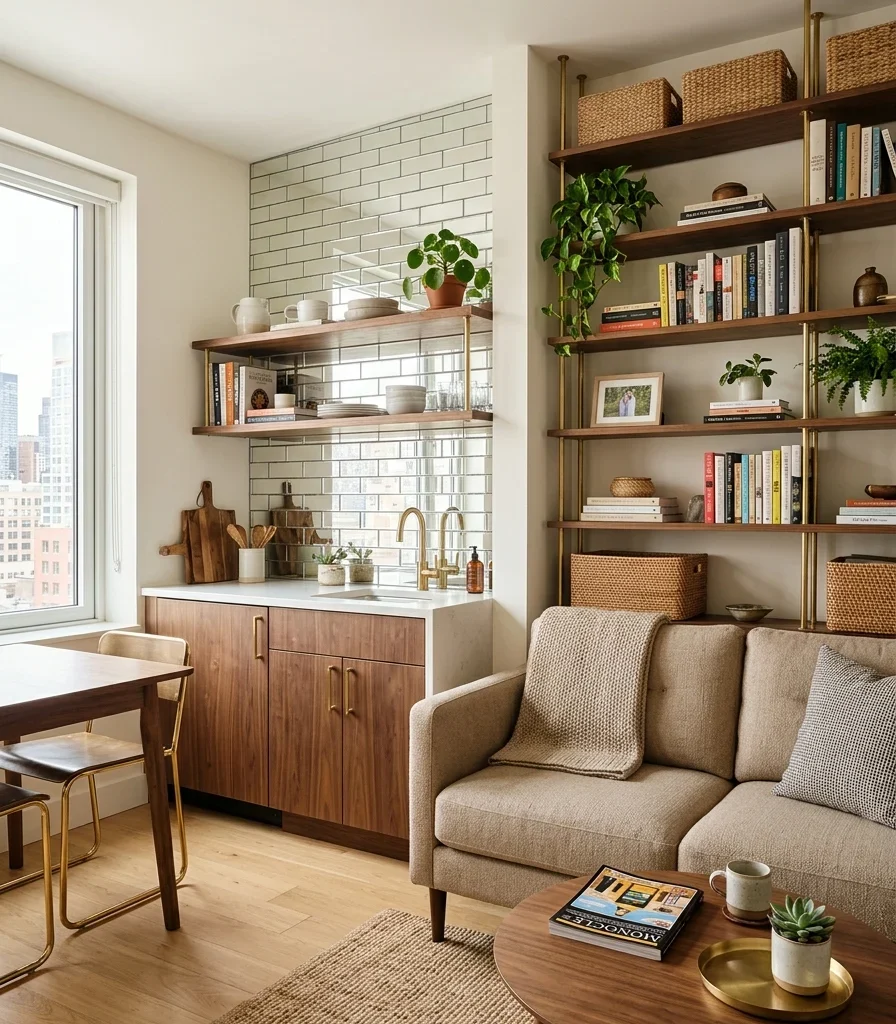
Vibe: Airy, a small footprint that borrows every inch of light it can find.
Why it works: In a genuinely small open concept space, the priority shifts from zone definition to light maximization; a mirrored or glossy tile backsplash reflects both the kitchen window’s natural light and the living room’s lamp light into the room, effectively doubling the perceived light source count without adding a single fixture. Furniture scaled down to apartment proportions keeps sightlines open in a footprint too tight for the full-scale versions of ideas earlier in this list.
How to get it: Install a glossy or mirrored subway tile backsplash on the kitchen’s most light-exposed wall, choose a loveseat or apartment-scale sofa no deeper than 34 inches, and use vertical wall shelving rather than floor-standing furniture wherever storage is needed, since vertical storage claims almost no floor footprint.
💡 Quick Win: A single large leaning mirror placed at the seam between the kitchen and living room does almost the same light-bouncing job as a full mirrored backsplash, for a fraction of the installation effort.
Shop the Look
| Product |
| Mirrored glossy subway tile backsplash |
| Apartment-scale loveseat compact |
| Tall vertical wall shelving unit |
| Large leaning floor mirror |
| Woven storage basket set stackable |
How to Start Your Open Concept Kitchen and Living Room Transformation
Start with the flooring. Before choosing paint or buying furniture, decide on one continuous flooring material for both zones, because every other decision- placement, furniture legs, sightlines depends on that floor reading as one surface rather than two. Wide-plank engineered white oak in a warm honey tone is the single most versatile starting choice, pairing equally well with sage green, warm white, and walnut wood tones used across the ideas in this list.
The most common mistake is treating the kitchen and living room as two separately decorated rooms that simply happen to share airspace; mismatched wood tones, a gray-washed kitchen floor against a warm walnut coffee table, for instance, is the specific error that breaks an open concept room’s cohesion fastest. Fix this by choosing one dominant wood undertone, warm or cool, and auditing every wood surface in both zones against it before finalizing any furniture purchase.
Three items under $50 that create immediate impact: a sage green throw pillow cover ($15-$25) that echoes cabinet color into the living room; a roll of painter’s tape and a warm greige paint sample pot ($10-$15) to test wall color continuity between zones before committing to gallons; and a brass cabinet knob or drawer pull set ($20-$40) that upgrades kitchen hardware to match living room lamp and frame finishes.
A cosmetic open concept refresh new paint, one accent piece, updated hardware, a properly sized rug is a genuine two-to-three weekend project costing $500-$1,500. A mid-level transformation involving new flooring, a range hood update, and lighting layers typically runs $5,000-$15,000 and takes three to six weeks with contractors. A full structural renovation involving wall removal starts around $15,000 and climbs quickly depending on whether the wall is load-bearing, often taking two to four months including permitting and structural engineering.
Frequently Asked Questions About Open Concept Kitchen and Living Room Ideas
What’s the difference between an open concept and a “great room” layout?
Both terms describe combined living spaces, but a great room historically refers to a single large room built as one space from the start, often including a fireplace as its focal point, while open concept typically describes a kitchen and living room that were once separated by a wall that has since been removed or was never fully enclosed. In practice, the terms have merged in modern real estate listings, but the distinction matters for renovation planning: a true open concept project usually involves demolition and structural assessment, while a great room is a design and furnishing challenge only, since the architecture is already unified.
What color palette works best for an open kitchen and living room?
A palette built around one warm neutral, such as warm white or greige, used consistently on walls and cabinetry in both zones, with two or three accent colors repeated in small doses, performs best in open concept spaces because it gives the eye one consistent base to travel across without visual interruption. Sage green, warm charcoal, and terracotta are the accent colors currently trending most in open concept kitchens according to recent Pinterest and paint-brand search data. Avoid using more than three distinct wall or cabinet colors across the combined space, since each additional color adds a visual seam the open layout doesn’t have architecture to support.
How much does it cost to open up a kitchen to the living room?
Removing a non-load-bearing wall between a kitchen and living room typically costs $1,000-$3,000 including demolition, patching, and finishing, while removing a load-bearing wall requiring a structural beam and engineering approval runs $4,000-$10,000 or more depending on the span and local permitting costs. Beyond the wall removal itself, most homeowners budget an additional $5,000-$20,000 for the cosmetic work that makes the newly combined space feel intentional, matching flooring, updated lighting, and new paint. Getting a structural engineer’s assessment before budgeting is the only way to know which cost range applies to a specific home.
Does open concept work in an older or traditional-style home?
Open concept layouts can work in older or traditional homes, but the transformation requires more deliberate material bridging than in a home built open from the start, since traditional trim, moldings, and door casings can look abruptly cut off where a wall used to be. The fix is to run matching millwork, such as a picture rail or a consistent baseboard height, uninterrupted through the newly opened sightline, and to choose furniture and lighting finishes, aged brass and walnut wood, that echo the home’s existing traditional character rather than importing a fully modern material palette that clashes with original architectural details.
How big should a kitchen island be for an open concept layout?
A kitchen island intended to also anchor sightlines into an open living room generally needs a minimum of 6 feet in length to read as a substantial architectural element rather than a small prep cart, with 8-10 feet being the more common size in open floor plans of 300 square feet or larger. The island also needs a minimum of 42 inches of clearance on any side used for regular walking, and 36 inches on any side without regular foot traffic, so the size should always be planned against the room’s total footprint rather than chosen for counter space alone.
Ready to Create Your Dream Open Concept Kitchen and Living Room?
These 15 open concept kitchen and living room ideas move across color echoes, material continuity, layered lighting, and layout tricks that make one combined room function like a considered whole rather than two rooms sharing a floor. Nobody needs to remove a wall and renovate every surface in the same month; starting with one continuity move, a shared paint color or a single repeated accent, is a legitimate and genuinely effective place to begin. Today, stand in the spot where your kitchen and living room currently meet and photograph exactly what breaks the sightline first, whether that’s a mismatched floor transition or two unrelated wall colors. Once that seam is resolved, the open concept payoff isn’t just visual; it’s the specific ease of never missing a conversation from the stove, of one room holding an entire evening instead of two rooms taking turns. Save the ideas that solve your own room’s seam first, and let the island, the floor, or that one long horizontal art piece be where your open concept story actually begins.
You Might Also Like
- 15 Ways to Decorate an Open Plan Kitchen Dining Space
- 15 Open Shelving in the Kitchen | Kitchen Storage Ideas
- 15 Ways to Maximize Space in an Open Plan Kitchen Room
- 10 Open Kitchen Partition Ideas Worth Saving
- 14 Coastal Kitchen Decor Ideas for a Breezy, Sunlit Space
- 15 Luxurious Classic Kitchen Design Ideas With Real Architectural Detail