
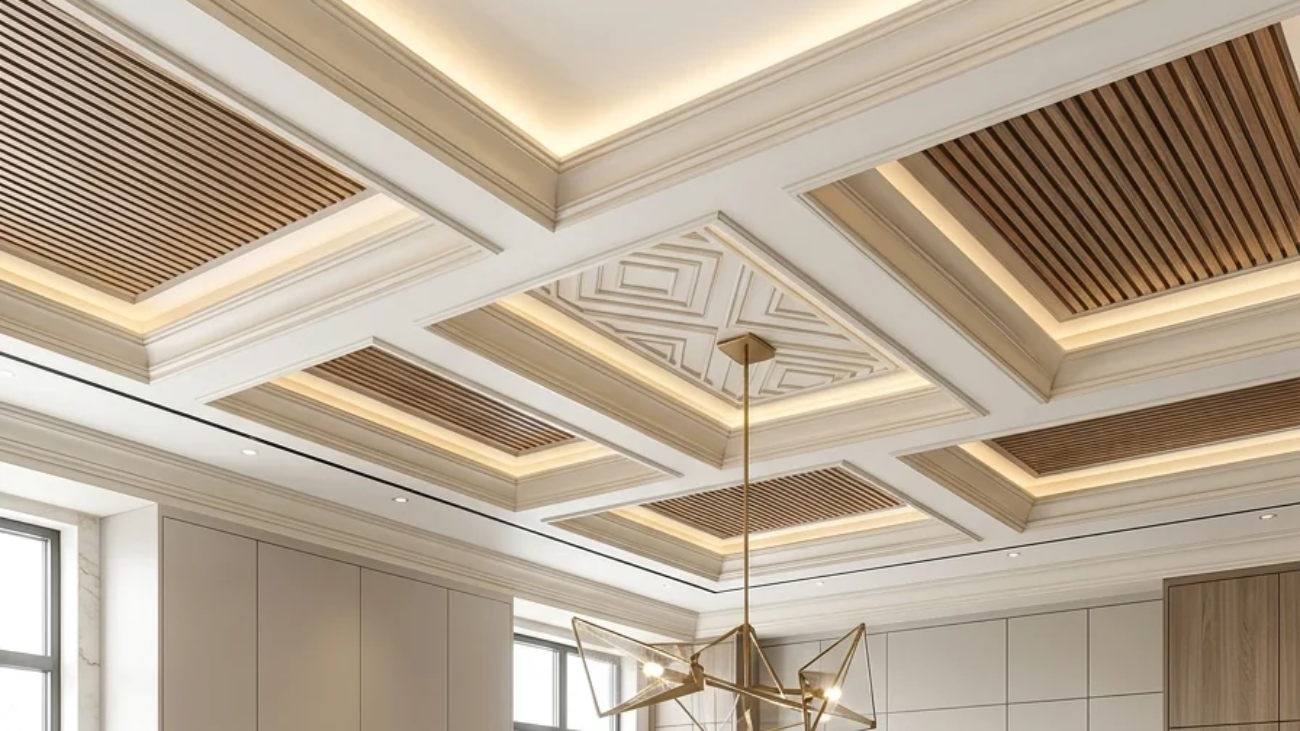
A modern luxury kitchen ceiling design treats the fifth wall the ceiling as a genuine design surface, using beams, color, texture, and light to finish a kitchen from every angle instead of leaving it as an afterthought painted flat white. This article gives you 15 genuinely striking ways to create a modern luxury kitchen ceiling design, covering material, color, lighting, and layout decisions for the one surface most kitchen renovations skip entirely.
It feels like looking up and realizing the room was finished on purpose: walnut beams catching light at an angle no wall could, a deep charcoal ceiling making the room feel wrapped rather than boxed, a single chandelier hanging like the room’s own piece of jewelry. This is modern luxury kitchen ceiling design at its most complete: considered from the floor to the very top of the room. Every choice earns its place because a ceiling left blank is square footage most kitchens waste entirely.
Here are 15 ideas worth saving and stealing.
Why Modern Luxury Kitchen Ceiling Design Works So Well
Treating the ceiling as a genuine design surface draws from architectural traditions that never left it plain: coffered ceilings from classical and Renaissance interiors, exposed timber framing from vernacular and craftsman building, and the more recent architectural lighting movement that integrates cove and recessed detailing directly into the ceiling plane rather than hanging fixtures from a blank one. What makes it distinctly modern luxury is combining these older architectural gestures with clean, current materials and integrated lighting rather than heavy ornamental plasterwork.
Core materials include walnut or white oak beams, tongue-and-groove wood planking, high-gloss lacquer paint, and architectural wallpaper. Color ranges from deep charcoal or warm black for drama to glossy warm white for reflected light, with two-tone splits used to zone specific areas of a large kitchen.
This approach is trending because open-concept kitchens now function as the primary room guests see from every angle, including looking up, and design-industry data shows rising specification of coffered and beamed kitchen ceilings as homeowners look for a genuine architectural detail that a flat popcorn or drywall ceiling can’t provide.
Yes, with real limits, a kitchen with a standard 8-foot ceiling can’t support heavy coffering or deep beams, which need ceiling height to read proportionally. Prioritize color and lighting first in a lower-ceiling kitchen; they add drama without stealing headroom the way structural beams do.
Style at a Glance
| Element | Core Trait 1 | Core Trait 2 |
| Philosophy | The ceiling finished as a genuine design surface, not left blank | Architectural detail combined with integrated modern lighting |
| Materials | Walnut or oak beams, tongue-and-groove planking | High-gloss lacquer, architectural wallpaper |
| Color Palette | Deep charcoal for drama | Glossy warm white for reflected light |
15 Ways to Create a Modern Luxury Kitchen Ceiling Design
1. Build a Coffered Ceiling With Walnut Beams
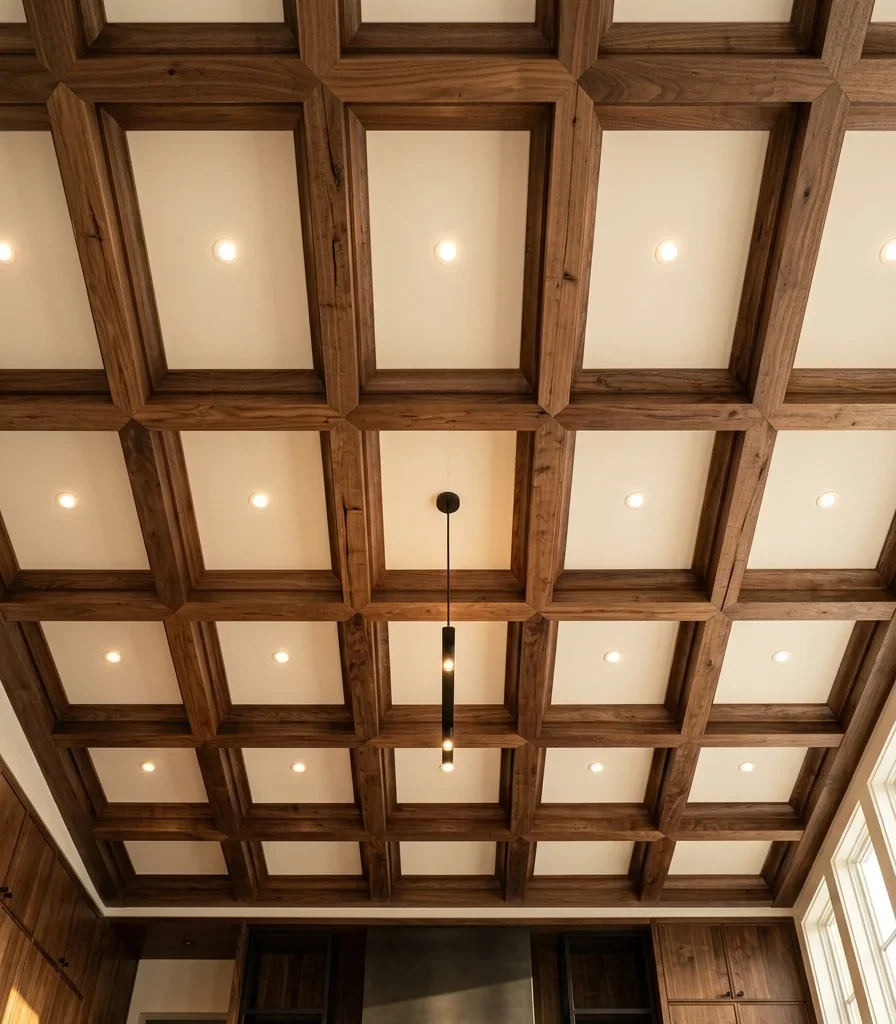
Vibe: Grounded, a ceiling with genuine architectural rhythm instead of one flat, uninterrupted plane.
Why it works: A coffered grid applies proportion and visual-weight principles at ceiling scale; the walnut beams create a repeating structural pattern that gives the room’s tallest surface real dimension, and the recessed panels between beams read as deliberately deep rather than simply flat, an effect no applied trim or paint alone can achieve.
How to get it: Specify solid walnut or walnut-veneer beams at least 6 inches deep spaced in a grid no smaller than 4×4 feet per coffer, painting the recessed panels in warm white so the wood beams read as the dominant structural element against a lighter backdrop.
💡 Quick Win: Lightweight faux-wood coffer panels achieve a similar grid pattern at a fraction of the weight and cost of solid beams.
Shop the Look
| Product |
| Solid walnut ceiling beam set |
| Faux wood coffer panel kit |
| Warm white ceiling paint |
| Small pendant for coffer recess |
| Matte black beam mounting hardware |
2. Paint a Deep Charcoal Ceiling for a Dramatic Drop
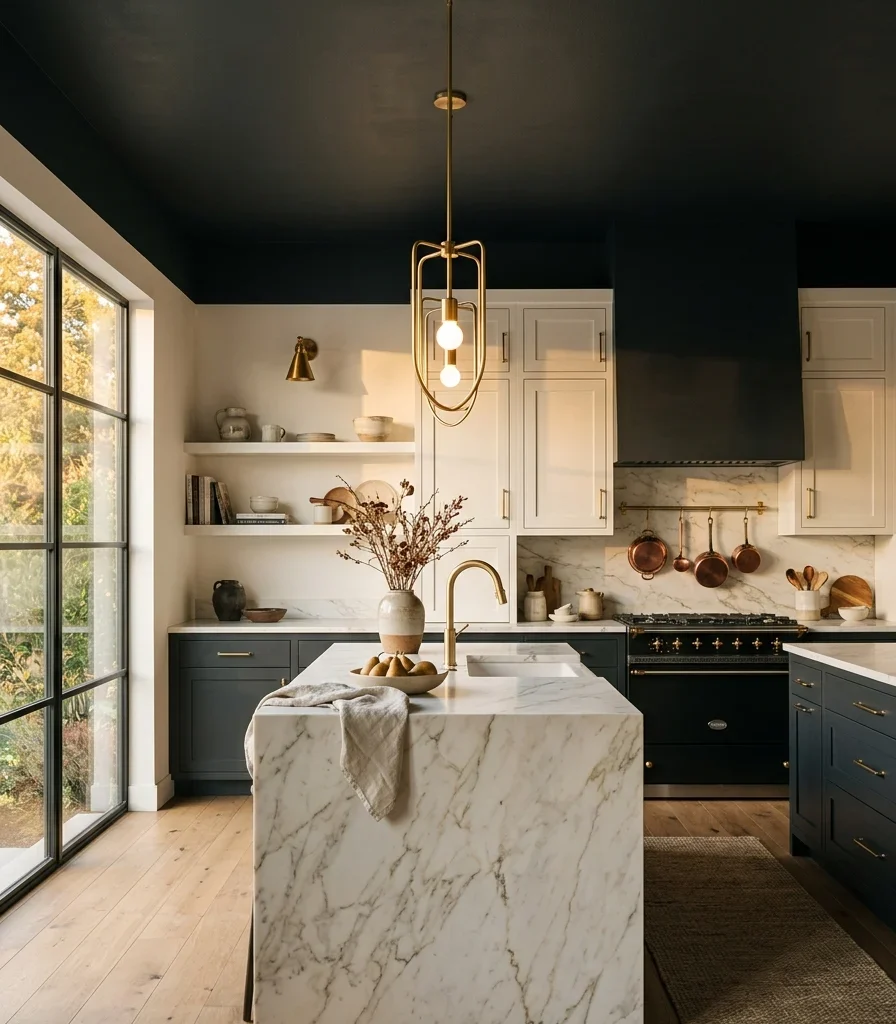
Vibe: Moody, a ceiling dark enough to feel like it’s pulling the whole room in around you.
Why it works: Painting the ceiling in a saturated dark tone is a contrast principle that inverts the usual assumption that dark ceilings shrink a room. In a kitchen with generous ceiling height, a deep charcoal ceiling actually creates a cocooning, intimate effect, drawing the eye upward toward a genuine focal plane instead of letting it disappear into a flat white void.
How to get it: Reserve this technique for kitchens with at least 9-foot ceilings, using a matte (not glossy) warm charcoal that avoids reading as a mistake or an unfinished primer coat, and pair it with warm brass or gold fixtures that catch light against the dark backdrop.
Shop the Look
| Product |
| Warm charcoal matte ceiling paint |
| Warm brass pendant light |
| Ceiling paint primer for dark tones |
| Small ceramic countertop vessel |
| Brass ceiling canopy trim |
3. Hang a Sculptural Pot Rack as a Ceiling Fixture
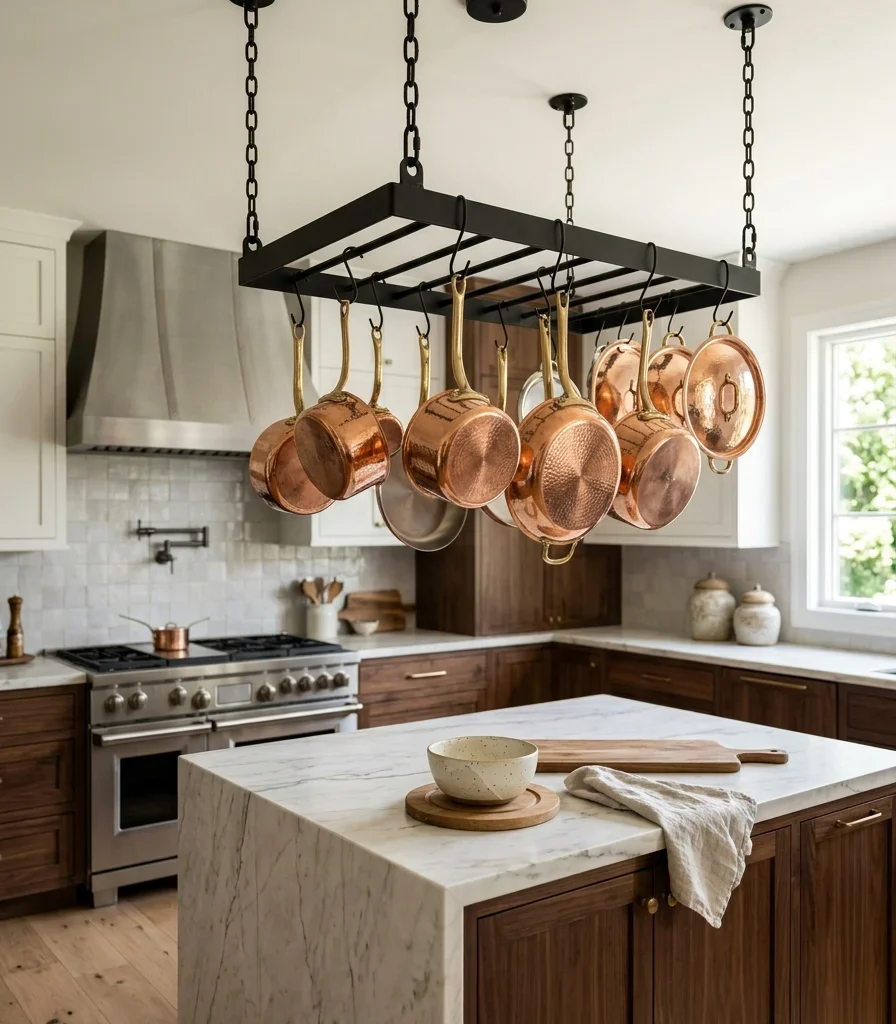
Vibe: Layered cookware turned into ceiling-level decor, doing double duty as function and display.
Why it works: A hanging pot rack applies negative-space and furniture-arrangement thinking specifically to the ceiling plane; rather than cookware occupying cabinet space, it hangs at eye level between the ceiling and counter, using vertical volume most kitchens leave empty above the island.
How to get it: Mount a matte black rack from ceiling joists rated for the combined weight of a full cookware set, positioning it centered over the island at a height that clears the tallest person’s head by at least 12 inches, and hang pots by size for visual order.
Shop the Look
| Product |
| Matte black ceiling pot rack |
| Ceiling joist mounting hardware |
| Copper cookware set |
| Small ceramic countertop bowl |
| Matte black S-hooks for hanging |
4. Recess Cove Lighting Around the Ceiling Perimeter
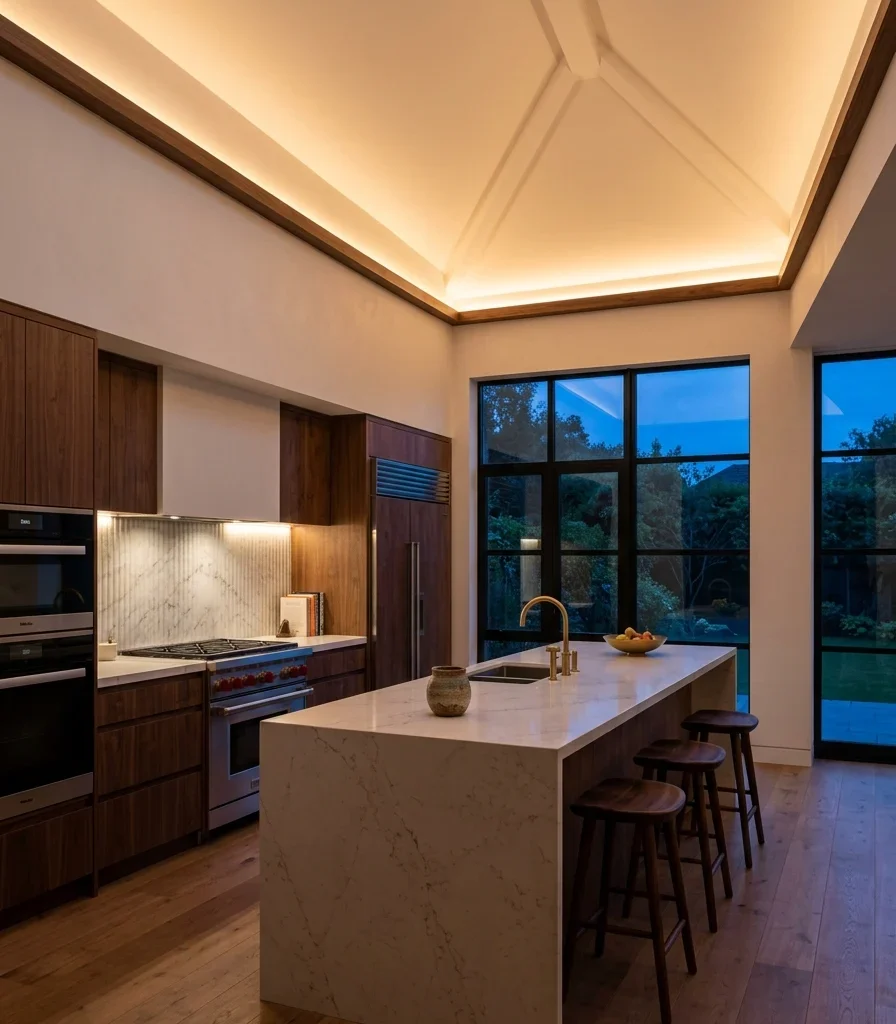
Vibe: Warm, a ceiling edge that glows softly instead of relying on a single central fixture to light the whole room.
Why it works: Cove lighting integrated into the ceiling perimeter is an architectural light-layering technique that raises the perceived ceiling height by washing the wall-to-ceiling transition with indirect light; it also complements pendant and task lighting below rather than competing with it, adding a genuine ambient layer most kitchens skip entirely.
How to get it: Recess a warm 2700K LED strip into a routed channel set back at least 4 inches from the ceiling edge, angled to wash upward and outward, wired to its own dimmer separate from the island pendants and under-cabinet task lighting.
Shop the Look
| Product |
| Recessed cove LED channel kit |
| Warm 2700K LED strip |
| Ceiling cove dimmer switch |
| Small ceramic decorative vessel |
| Cove channel trim molding |
5. Wallpaper the Ceiling With a Botanical Print
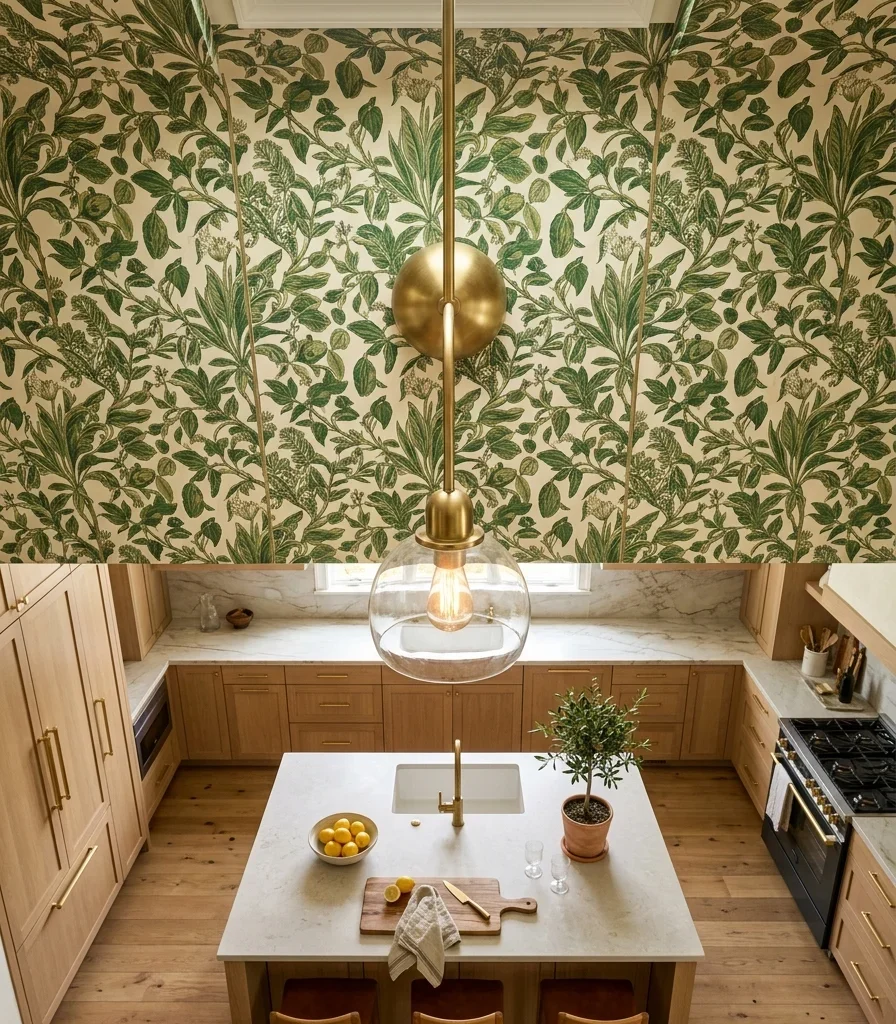
Vibe: Layered a ceiling with genuine pattern, turning an overlooked surface into the room’s unexpected detail.
Why it works: Wallpapering the ceiling is a texture and pattern-layering principle rarely applied above eye level, which is precisely why it reads as a surprising, considered choice. A botanical print overhead references the biophilic pattern trend without requiring any actual plants, and because the ceiling sees no foot traffic or splashing, wallpaper survives there far better than it would on a kitchen wall.
How to get it: Choose a pre-pasted, moisture-resistant wallpaper in a botanical print with a small to medium-scale repeat (large patterns can distort visually overhead), and hire an installer experienced with ceiling application, since hanging paper overhead is more physically demanding than a wall.
💡 Quick Win: Peel-and-stick wallpaper on the ceiling achieves the same visual effect with an easier, more forgiving installation for a first attempt.
Shop the Look
| Product |
| Moisture-resistant botanical wallpaper |
| Peel and stick botanical ceiling paper |
| Warm brass pendant light |
| Wallpaper smoothing tool |
| Small ceramic countertop vessel |
6. Hang a Single Statement Chandelier as Ceiling Jewelry
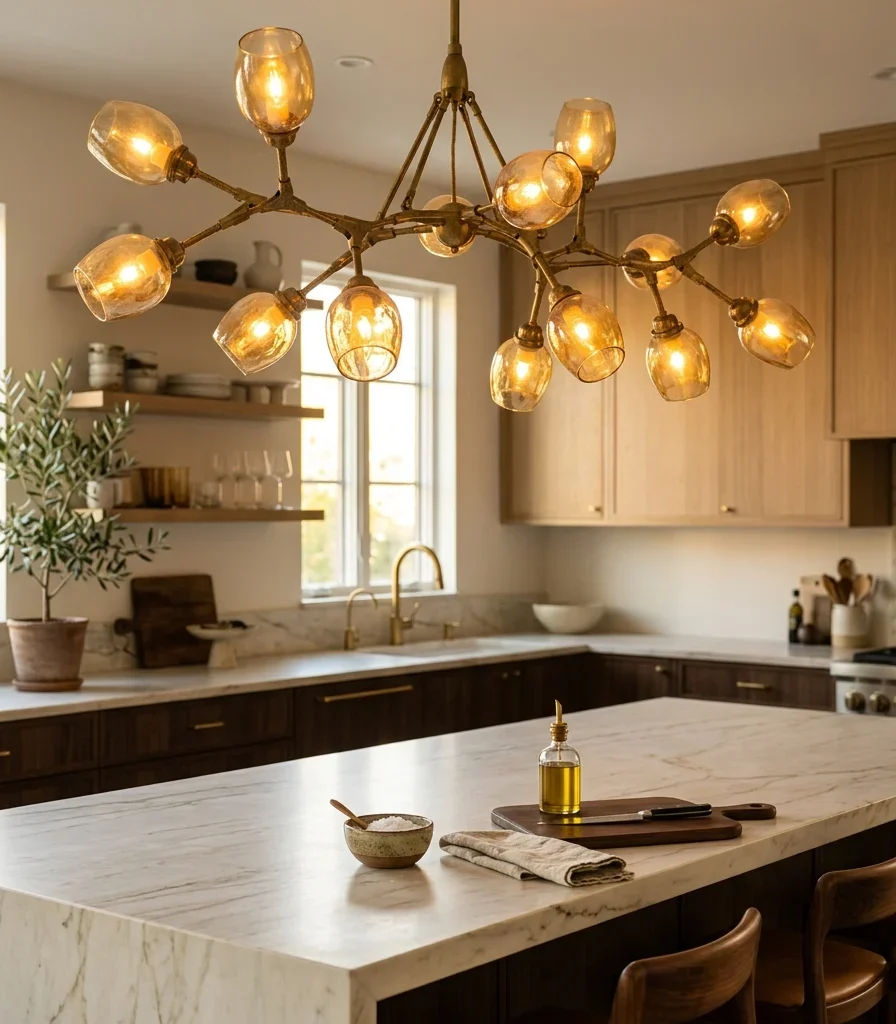
Vibe: Warm, a single fixture with enough scale and detail to function as the whole ceiling’s centerpiece.
Why it works: A genuinely sculptural chandelier applies visual-weight principles the way a statement necklace draws the eye; its scale and detail give the ceiling plane a clear focal point, which matters because kitchens with high or vaulted ceilings otherwise risk that upper volume reading as space rather than an intentional part of the room.
How to get it: Size the chandelier to roughly two-thirds the island’s length, hanging it at least 34 inches above the counter to clear sightlines, and choose warm 2700K bulbs visible through the shades so the fixture itself glows rather than reading as a dark silhouette during the day.
Shop the Look
| Product |
| Multi-arm brass chandelier fixture |
| Warm 2700K glass shade bulb |
| Brass ceiling canopy trim |
| Small ceramic countertop bowl |
| Adjustable chandelier chain kit |
7. Split the Ceiling Two-Tone Between Island and Perimeter
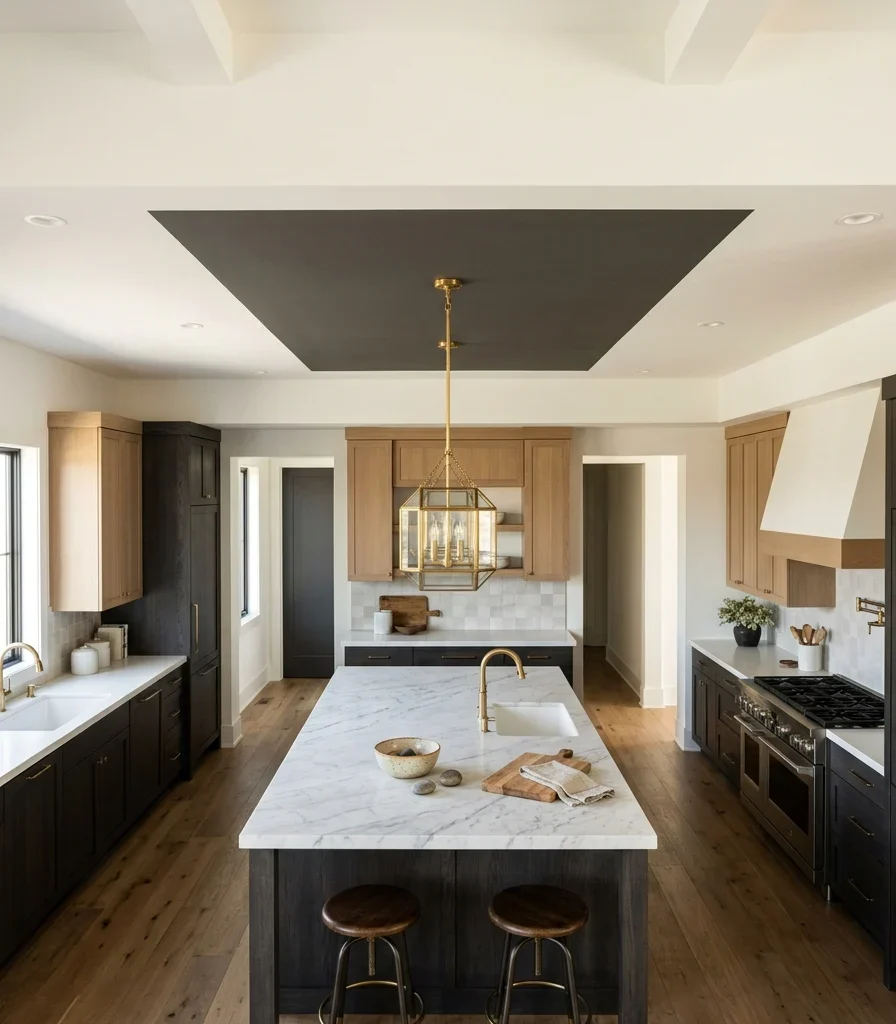
Vibe: Grounded, a ceiling that visually marks exactly where the island’s zone begins and ends, even looking straight up.
Why it works: Painting a defined rectangular zone directly above the island in a contrasting tone is a zone-definition principle applied overhead rather than at floor level; the ceiling itself signals the island’s boundary, reinforcing the room’s layout in a kitchen large enough that floor-level zoning alone doesn’t fully register from every angle.
How to get it: Measure the island’s exact footprint and paint the ceiling section directly above it in charcoal, extending the boundary 6 to 12 inches beyond the island’s edges on all sides, keeping the surrounding ceiling in warm white.
Shop the Look
| Product |
| Warm charcoal ceiling paint |
| Warm white perimeter ceiling paint |
| Painter’s tape precision edge |
| Warm brass pendant light |
| Small ceramic countertop bowl |
8. Suspend a Glass-Front Cabinet From the Ceiling
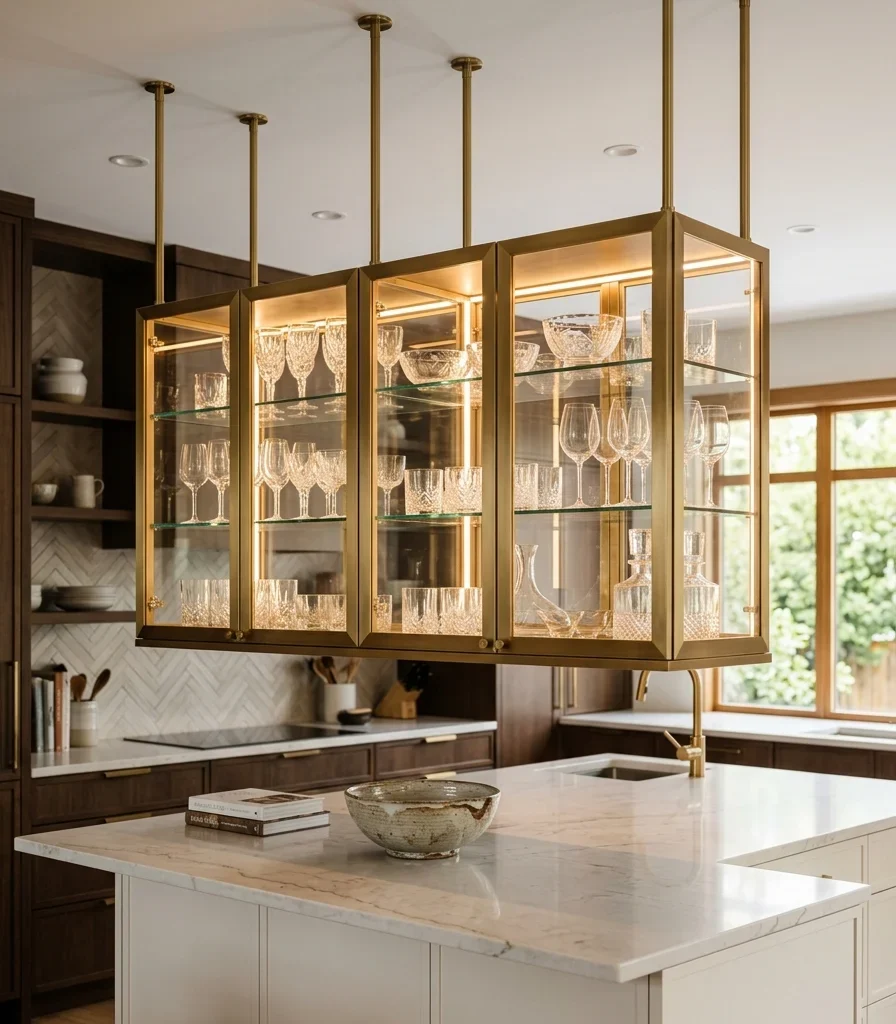
Vibe: Warm storage that appears to float above the island, lit from within like a small display case.
Why it works: A ceiling-suspended cabinet applies negative-space and furniture-arrangement thinking to storage that would normally sit on the floor or against a wall because it hangs from brass rods rather than standing on legs; the floor beneath stays entirely open, and its glass front with interior lighting turns everyday glassware into genuine ceiling-level display.
How to get it: Suspend the cabinet on four brass rods anchored to ceiling joists rated for its fully loaded weight, wire warm 2700K interior LED lighting on its own switch, and position it above the island rather than a walkway so nothing passes beneath it at head height.
Shop the Look
| Product |
| Ceiling suspended glass cabinet |
| Brass suspension rod set |
| Interior LED cabinet light strip |
| Ceiling joist mounting bracket |
| Small ceramic countertop bowl |
9. Position a Skylight Directly Over the Island
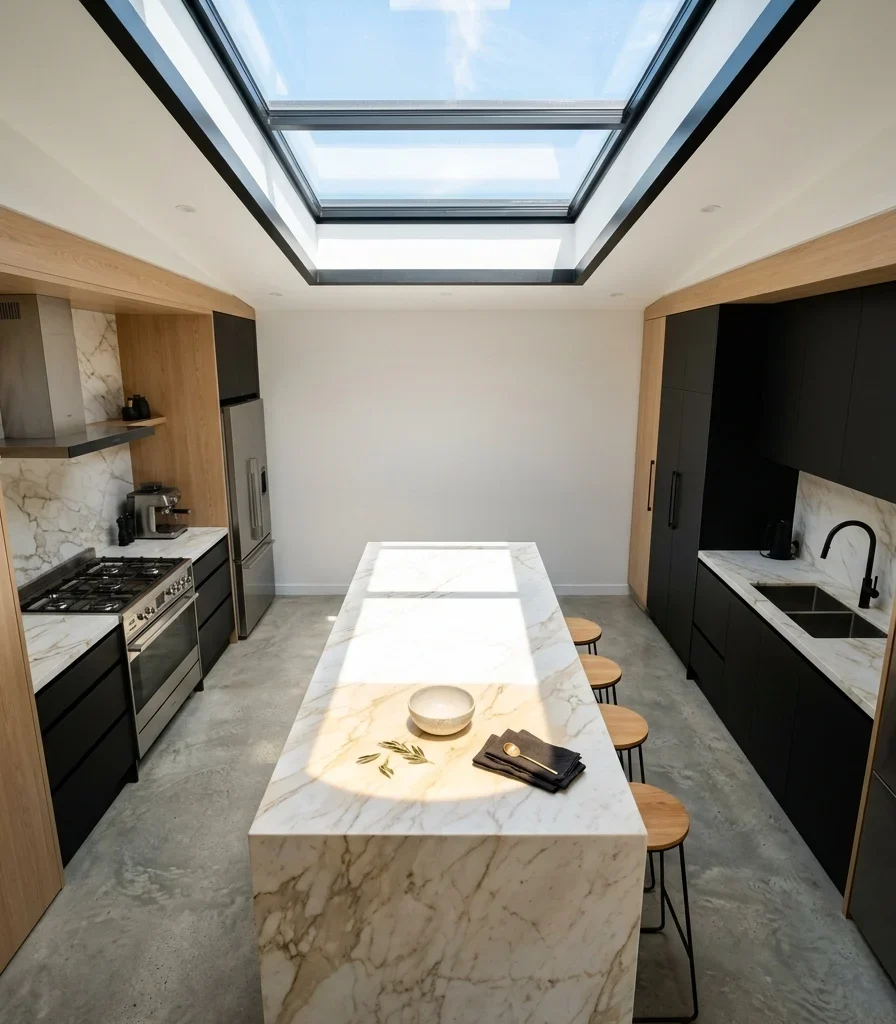
Vibe: Luminous, a pool of genuine daylight landing exactly where the room’s most-used surface sits.
Why it works: Positioning a skylight directly over the island rather than a random ceiling location is a light-behavior principle that puts natural daylight precisely where it matters most for both function and photography; food prep and the room’s central gathering point both benefit from direct overhead daylight in a way ambient window light from the side never fully achieves.
How to get it: Size the skylight to roughly one-third the island’s length for a proportional daylight pool, choosing a fixed (non-operable) unit if ventilation isn’t a priority, since fixed skylights cost less and have fewer potential leak points than operable ones.
Shop the Look
| Product |
| Fixed skylight unit |
| Skylight flashing kit |
| Warm white marble island counter |
| Small ceramic countertop bowl |
| Matte black skylight interior trim |
10. Install a Tongue-and-Groove Wood Plank Ceiling
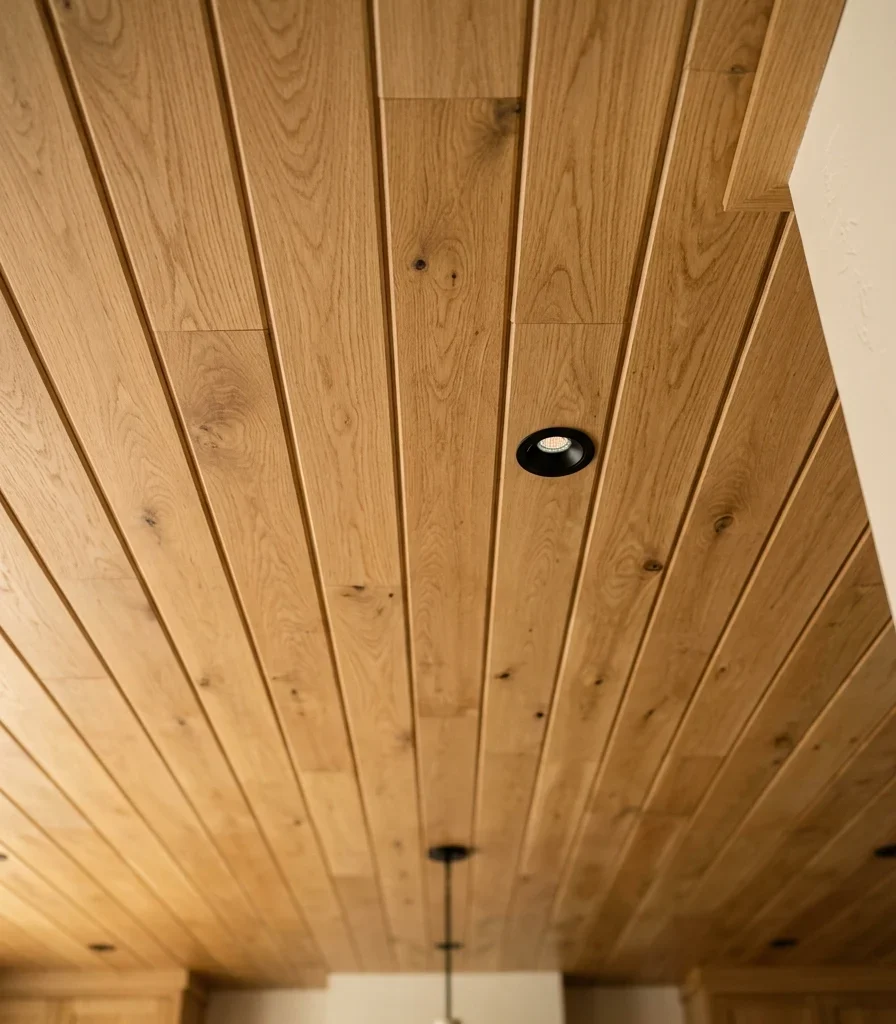
Vibe: Sun-warmed ceiling with genuine wood grain running overhead instead of flat drywall.
Why it works: Tongue-and-groove planking is a material-honesty principle that gives the ceiling texture and warmth without the structural depth a full coffered grid requires. The plank seams create a directional linear pattern that, when run the length of a galley or narrow kitchen, visually elongates the room when viewed from the doorway.
How to get it: Install white oak or pine tongue-and-groove planks running the room’s longest dimension, sealed in a matte finish rather than glossy polyurethane, and recess lighting flush between planks rather than surface-mounting fixtures that would interrupt the linear pattern.
Shop the Look
| Product |
| Tongue and groove white oak plank |
| Matte wood ceiling sealant |
| Recessed flush ceiling light |
| Small ceramic countertop vessel |
| Wood plank installation clips |
11. Paint the Ceiling in Glossy Lacquer to Reflect the Room
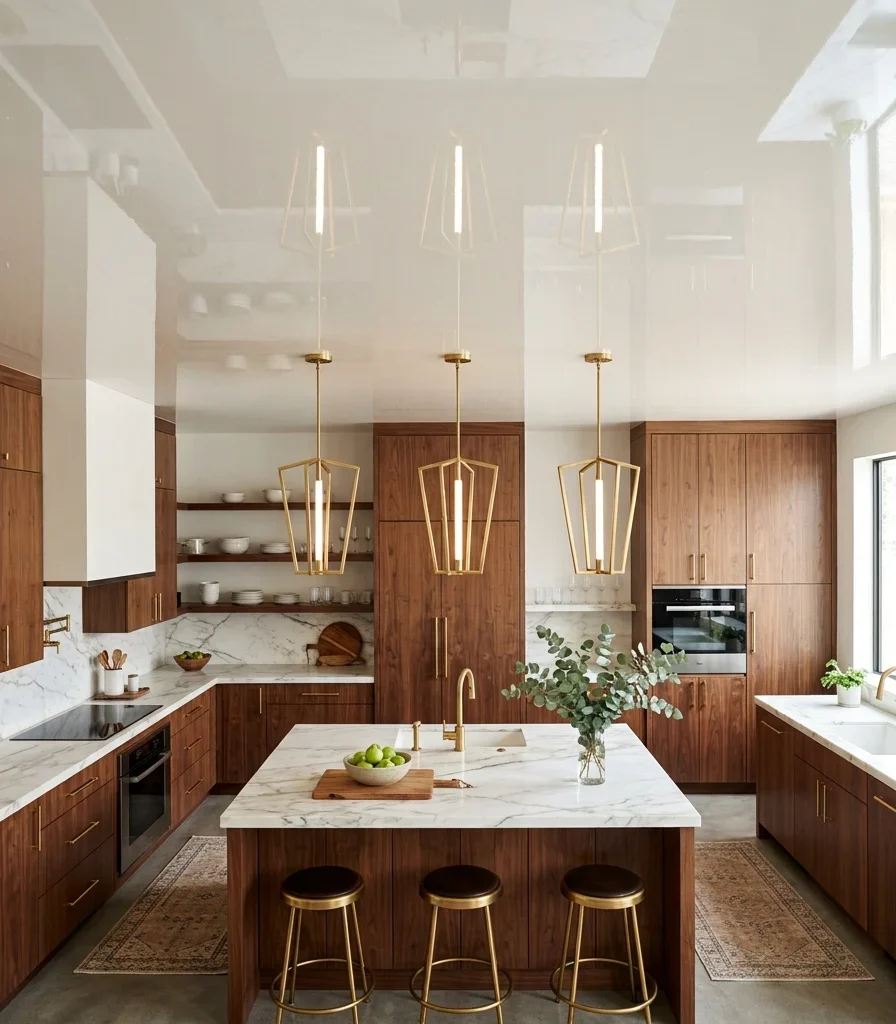
Vibe: Fresh a ceiling with just enough sheen to subtly double the room’s brightness without becoming a full mirror.
Why it works: A genuine multi-coat lacquer finish applies light-behavior principles at ceiling scale; the gloss reflects both ambient light and a soft impression of the room below, brightening a kitchen with limited natural light more effectively than a flat matte ceiling paint, which absorbs rather than bounces available light.
How to get it: Specify a genuine high-gloss lacquer application (multiple thin coats, each sanded between applications) rather than a single-coat glossy enamel, since a properly built-up lacquer finish reflects far more cleanly than a shortcut version.
Shop the Look
| Product |
| High gloss lacquer ceiling paint |
| Warm brass pendant light |
| Ceiling gloss primer coat |
| Small ceramic countertop vessel |
| Walnut cabinetry accent |
12. Add a Decorative Ceiling Medallion Behind the Pendant
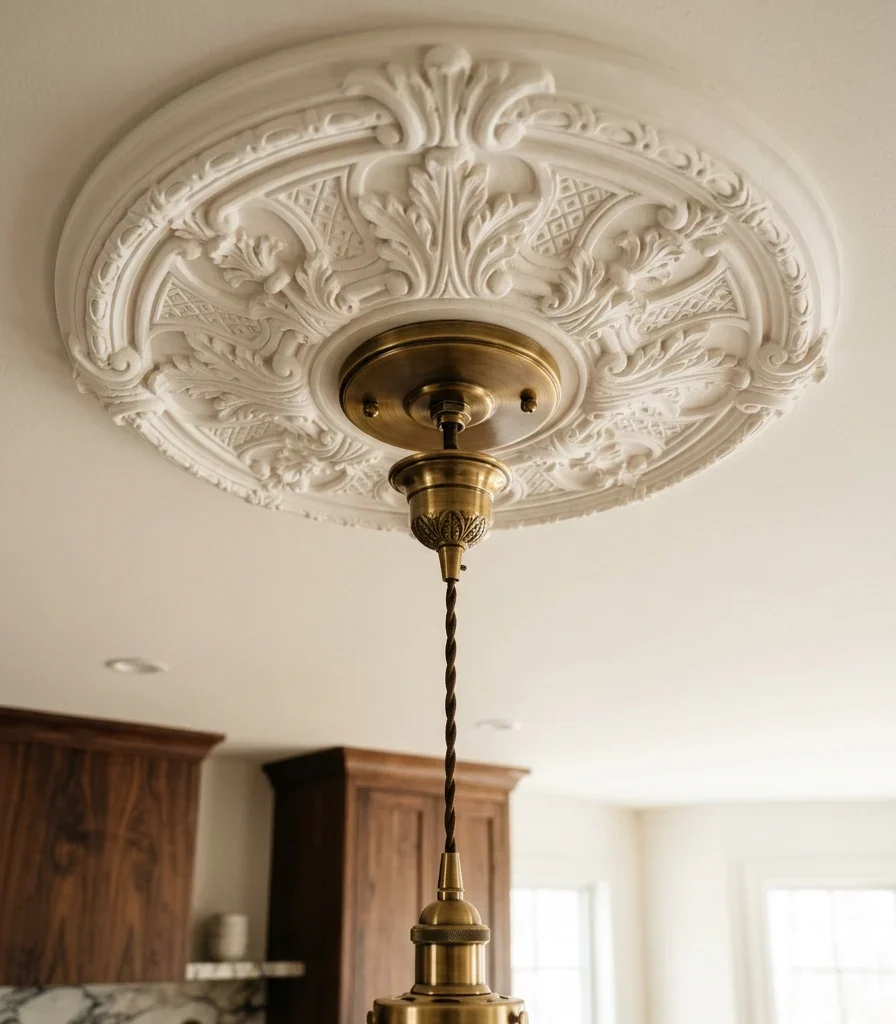
Vibe: Layered a small architectural detail that frames the pendant instead of leaving it hanging from a bare ceiling.
Why it works: A ceiling medallion applies accessory-layering directly to the ceiling plane. Most kitchens hang a pendant from a plain electrical box with no surrounding detail, and a carved medallion gives that mounting point genuine architectural presence, referencing classical plasterwork at a scale appropriate for a single fixture rather than the whole ceiling.
How to get it: Choose a medallion between 12 and 18 inches in diameter for proportion with a standard pendant, mounted flush around the existing electrical box, and paint it the same warm white as the surrounding ceiling so its relief detail reads through subtle shadow rather than color contrast.
Shop the Look
| Product |
| Carved plaster ceiling medallion |
| Warm brass pendant light |
| Ceiling medallion mounting adhesive |
| Warm white touch-up paint |
| Small ceramic countertop vessel |
13. Build a Tray Ceiling to Frame the Island Zone
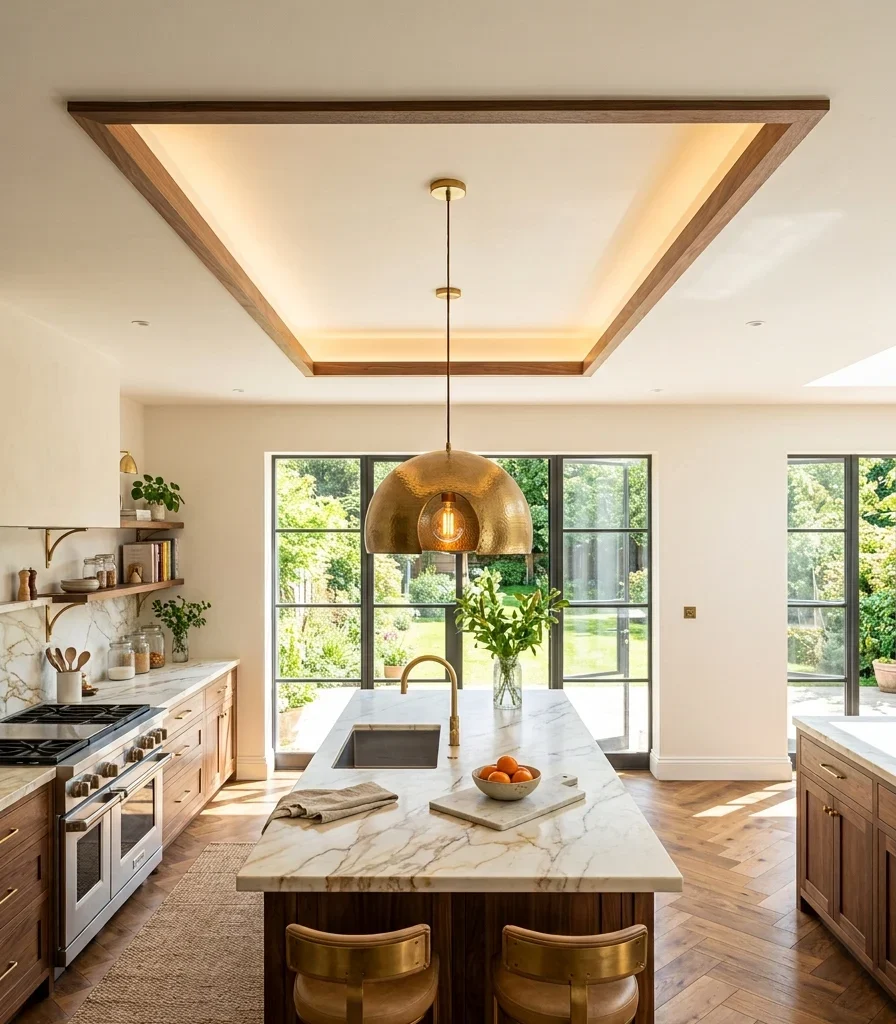
Vibe: Ground a ceiling with a genuine structural step that gives the island zone its own architectural frame.
Why it works: A tray ceiling applies proportion and zone-definition principles through actual construction rather than paint or light alone. The recessed stepped edge, typically 4 to 8 inches deep, creates a physical boundary overhead that echoes the island’s footprint, adding dimensional depth a flat ceiling with only a paint or lighting zone can’t fully replicate.
How to get it: Frame the tray to align with the island’s exact footprint, recessing the center section by at least 6 inches, and run cove lighting inside the tray’s inner edge so the recess is lit rather than shadowed.
Shop the Look
| Product |
| Tray ceiling framing kit |
| Recessed cove LED strip for tray |
| Walnut trim molding |
| Warm brass pendant light |
| Small ceramic countertop vessel |
14. Vary Ceiling Height to Zone Cooking From Dining
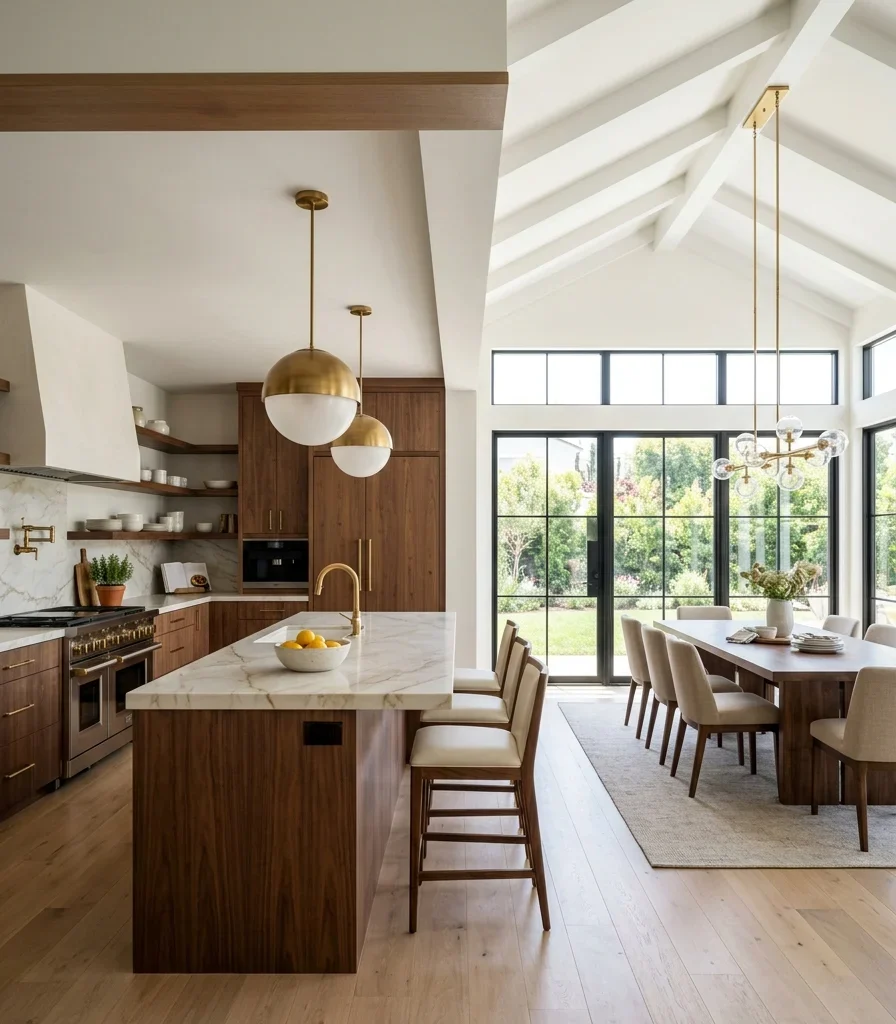
Vibe: Airy two connected zones that feel distinct the moment you look up, without any wall between them.
Why it works: Varying ceiling height between the cooking and dining zones is a layout principle that uses architecture itself to define traffic flow; a lower, more intimate ceiling over the working kitchen contrasts with a taller volume over the dining area, letting an open-concept space read as two purposeful zones rather than one undifferentiated room.
How to get it: If the structure allows (existing soffits or duct routing often already create natural height variation), emphasize the transition with a visible beam or trim line at the height change, and keep the ceiling finish consistent across both zones so the height itself, not a material shift, carries the zoning.
Shop the Look
| Product |
| Walnut transition beam trim |
| Warm brass pendant lower zone |
| Recessed lighting taller zone |
| Small ceramic countertop vessel |
| Warm white ceiling paint both zones |
15. Add a Mirrored Ceiling Strip to Visually Raise a Low Kitchen
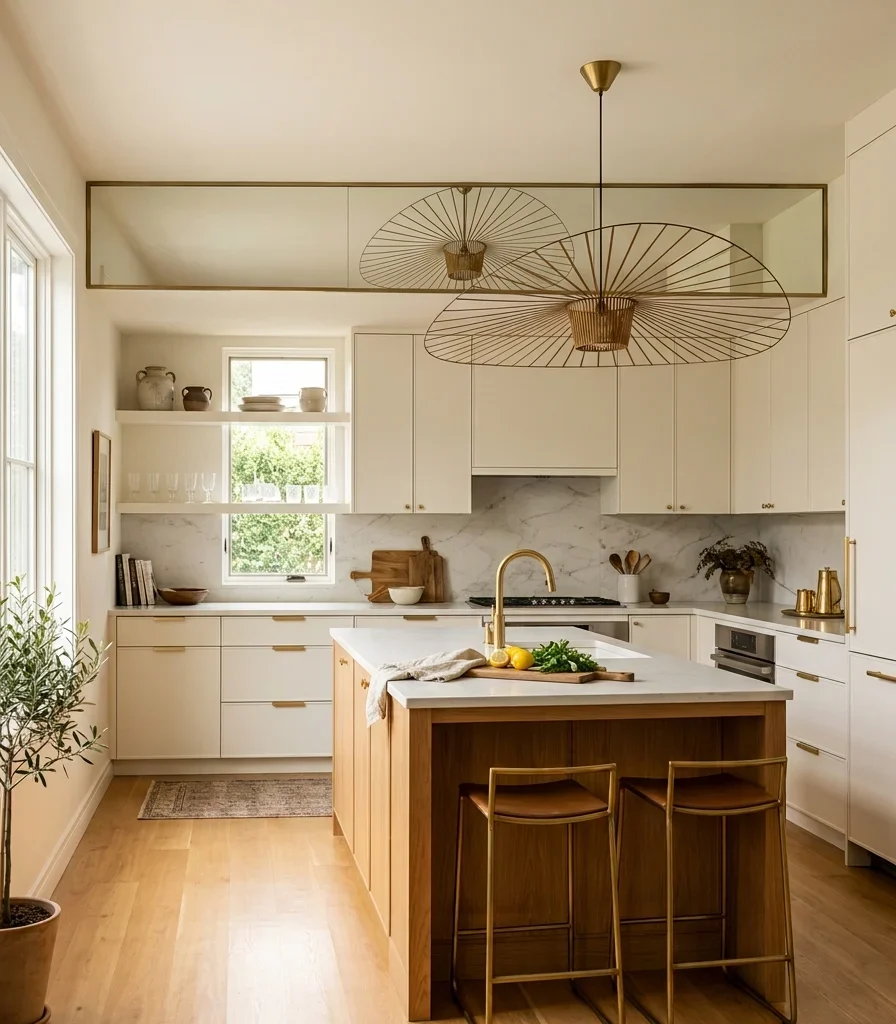
Vibe: Luminous, a narrow reflective seam that tricks the eye into reading more height than the room actually has.
Why it works: In a genuinely low kitchen ceiling under 8 feet, a full mirrored ceiling would feel disorienting, so the small-space adaptation is a narrow mirrored strip, typically 6 to 12 inches wide, run along one edge, usually where the ceiling meets an upper cabinet run, reflecting the room’s light and depth without committing to a full mirrored plane.
How to get it: Install a mirrored acrylic or glass strip along the ceiling edge directly above the tallest run of cabinetry, angled flush rather than tilted, since a flush mount reflects the room’s existing light sources rather than creating a distracting distorted angle.
💡 Quick Win: Mirrored ceiling tiles sized to a single strip’s width install without full custom fabrication, keeping the technique accessible for a smaller budget.
Shop the Look
| Product |
| Mirrored acrylic ceiling strip |
| Mirrored ceiling tile set |
| Warm brass pendant light |
| Mirror mounting adhesive strip |
| Small ceramic countertop vessel |
How to Start Your Modern Luxury Kitchen Ceiling Transformation
Your one first move is measuring your actual ceiling height before choosing any technique on this list, since structural options like coffering or a tray ceiling need at least 9 feet to read proportionally, while color and lighting-based techniques work in any kitchen regardless of height. This single measurement determines which category of idea is realistic before any material gets ordered.
The most common mistake is attempting a heavy structural treatment, like deep coffered beams, in a standard 8-foot kitchen, which reduces already-limited headroom and can make the room feel lower rather than more luxurious. The fix is defaulting to paint, lighting, or a shallow tray ceiling in any kitchen under 9 feet, reserving true structural beams for rooms with genuine height to spare.
Three items under $50 that create immediate impact: a warm 2700K LED strip for basic cove lighting, a carved plaster ceiling medallion for an existing pendant, and mirrored ceiling tiles for a small reflective accent strip.
A weekend refresh of cove lighting and a ceiling medallion costs $150–400. A full modern luxury kitchen ceiling transformation with coffered beams and integrated lighting typically runs $8,000–25,000 and takes two to five weeks depending on structural complexity.
Frequently Asked Questions About Modern Luxury Kitchen Ceiling Design
What is the difference between a coffered ceiling and a tray ceiling?
A coffered ceiling uses a full grid of beams creating multiple recessed panels across the entire ceiling. A tray ceiling recesses just one central section, typically above an island or dining area, stepping up or down from the surrounding flat ceiling, which requires less structural depth and cost than a full coffered grid.
What color works best for a modern luxury kitchen ceiling?
Deep charcoal works well in kitchens with at least 9-foot ceilings for a dramatic, cocooning effect, while warm white or a high-gloss lacquer finish works better in standard 8-foot kitchens, since lighter and reflective tones don’t visually lower the ceiling the way a dark matte finish can in a room without height to spare.
How much does a modern luxury kitchen ceiling renovation cost?
A budget refresh using paint and cove lighting costs $300–1,000. A mid-range treatment with a tray ceiling or tongue-and-groove planking runs $5,000–12,000, and a full coffered beam ceiling with integrated lighting typically costs $15,000–30,000 depending on beam material and ceiling square footage.
Can a kitchen with a low, standard ceiling still get a luxury ceiling treatment?
Yes, but structural options are limited; a mirrored ceiling strip, glossy lacquer paint, or recessed cove lighting all add genuine visual impact without requiring the 9-plus feet of height that coffering or deep beams need to read proportionally rather than oppressively.
What is the most requested kitchen ceiling feature right now?
Integrated cove lighting is currently the most requested single ceiling feature in kitchen renovations, according to design-industry data, since it works in nearly any ceiling height and budget range, followed by coffered beam ceilings in kitchens with sufficient height and a statement chandelier as a lower-cost focal alternative.
Ready to Create Your Dream Modern Luxury Kitchen Ceiling?
These 15 ideas move across material, color, lighting, layout, and true small-space solutions, from a full walnut coffered grid and a suspended glass cabinet to a narrow mirrored strip that adds perceived height to a genuinely low room. None of this needs to happen all at once, and starting with cove lighting and one statement fixture is genuinely the smartest place to begin, not a smaller version of the full vision. Today’s specific action: measure your kitchen’s actual ceiling height and cross-reference it against the ideas on this list before committing to any structural option, since that single number determines which techniques will actually read as intentional rather than cramped. Once the ceiling finally matches the care given to every surface below it, looking up in that kitchen will feel like discovering a room that was finished on purpose, not one that simply stopped at eye level. Save the ideas that fit your ceiling’s real height and your project’s real budget; that walnut beam grid and warm cove glow will still feel just as considered years from now.
You Might Also Like
- 14 Coastal Kitchen Decor Ideas for a Breezy, Sunlit Space
- 15 Luxurious Classic Kitchen Design Ideas With Real Architectural Detail
- 15 Ways to Decorate an Open Plan Kitchen Dining Space
- 15 Open Shelving in the Kitchen | Kitchen Storage Ideas
- 15 Ways to Achieve a Luxurious Contemporary Kitchen Design
- 15 Ways to Maximize Space in an Open Plan Kitchen Room