
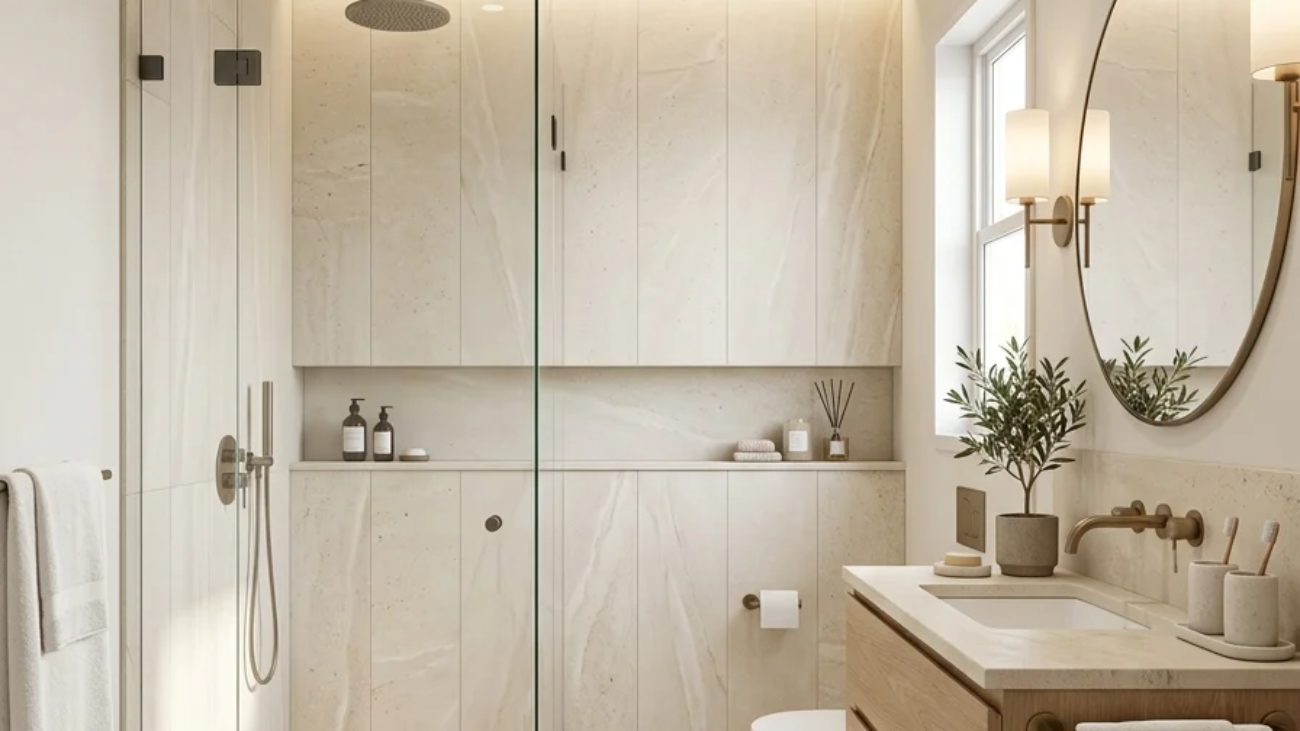
A small bathroom walk-in shower is a curbless or low-curb shower built without a swinging door or full enclosure, using open glass, a niche, and continuous flooring to make a compact bathroom feel larger and function more efficiently than a traditional tub-shower combo. This article gives you 15 practical, genuinely space-smart small bathroom walk-in shower ideas covering material, color, lighting, and layout decisions that let a tight 5×7 or 6×8 bathroom hold a real walk-in shower without feeling cramped.
It feels like stepping into a clean, quiet edit of the room: sightlines running uninterrupted from the vanity straight through frameless glass, steam curling against slab tile instead of pooling behind a curtain, light landing evenly instead of catching on a shower curb. This is the small bathroom walk-in shower at its best: open, considered, unmistakably modern. Every material choice earns its place because there’s no extra square footage to hide a mistake in.
Here are 15 ideas worth saving and stealing.
Why Small Bathroom Walk-In Shower Design Works So Well
The walk-in shower belongs to the modern minimalist design movement that emerged from European wet-room bathroom traditions, where showers were never boxed into a separate stall but treated as part of one continuous, waterproofed room. What distinguishes a walk-in shower from a standard enclosed shower stall is the absence of a swinging door and, often, the curb itself open glass or no glass at all- replacing the visual barrier a shower door normally creates.
Core materials run toward large-format porcelain slab (minimizing visible grout lines), honed slate or pebble stone for texture underfoot, matte black or brushed nickel for fixtures, and frameless low-iron glass for any remaining partition. Color stays clean and restrained: warm greige, warm white, deep charcoal as an accent, and sage green used sparingly, favoring tonal continuity over pattern.
This approach is trending because Pinterest and Google search data show walk-in and curbless showers as the most-requested bathroom renovation feature two years running, driven partly by aging-in-place demand for barrier-free bathrooms and partly by a broader shift toward open, uncluttered small-space design as more people renovate starter homes and condos rather than move.
Yes, small bathrooms are actually where walk-in showers perform best, because removing the curb and door eliminates the two elements that visually chop a tight room into fragments. Prioritize continuous flooring and a single glass panel (not a full enclosure) first; those two choices do the most to make the room feel larger.
Style at a Glance
| Element | Core Trait 1 | Core Trait 2 |
| Philosophy | Open sightlines over enclosed compartments | Continuous surfaces over fragmented ones |
| Materials | Large-format porcelain slab, honed slate, frameless glass | Matte black or brushed nickel fixtures, teak accents |
| Color Palette | Warm greige, warm white, deep charcoal accent | Sage green accent, natural stone grey |
15 Small Bathroom Walk-In Shower Ideas
1. Choose Large-Format Porcelain Slab Walls
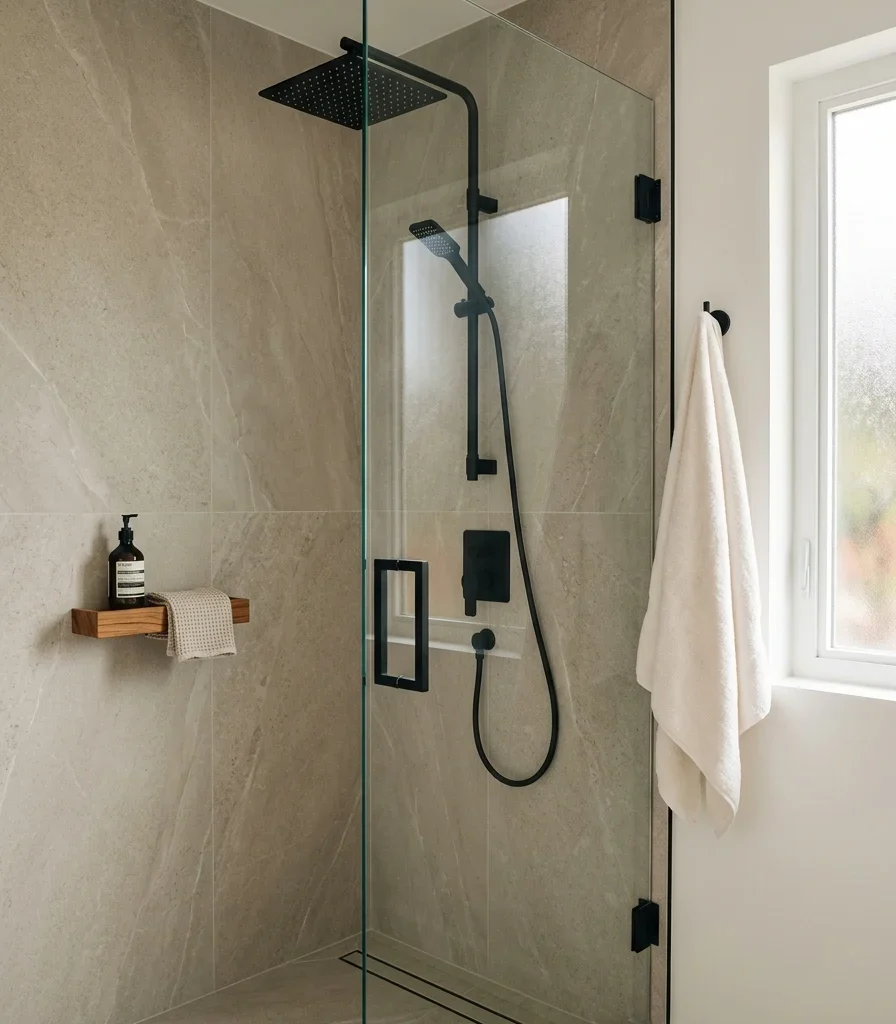
Vibe: Serene a wall with almost no visible seams, so the eye reads it as one continuous surface rather than dozens of individual tiles.
Why it works: Grout line reduction is a visual continuity principle specific to small spaces; a standard 4×4 or 12×12 tile creates a dense grid of dark grout lines that fragments a small shower wall visually, while large-format porcelain slabs (typically 60×120 cm or larger) minimize those lines dramatically, letting the wall read as one calm plane instead of a busy pattern.
How to get it: Specify porcelain slab panels rather than standard tile for at least the two most visible shower walls, and match the grout color as closely as possible to the slab’s base tone so any remaining seams disappear rather than standing out.
💡 Quick Win: Large-format 24×48-inch porcelain tile achieves 80% of the seamless effect at a fraction of full-slab installation cost.
Shop the Look
| Product |
| Large format porcelain slab tile |
| Matte black rain shower head |
| Color-matched unsanded grout |
| Small teak wood shower shelf |
| Matte black shower valve trim |
2. Pair Warm Greige With Crisp White
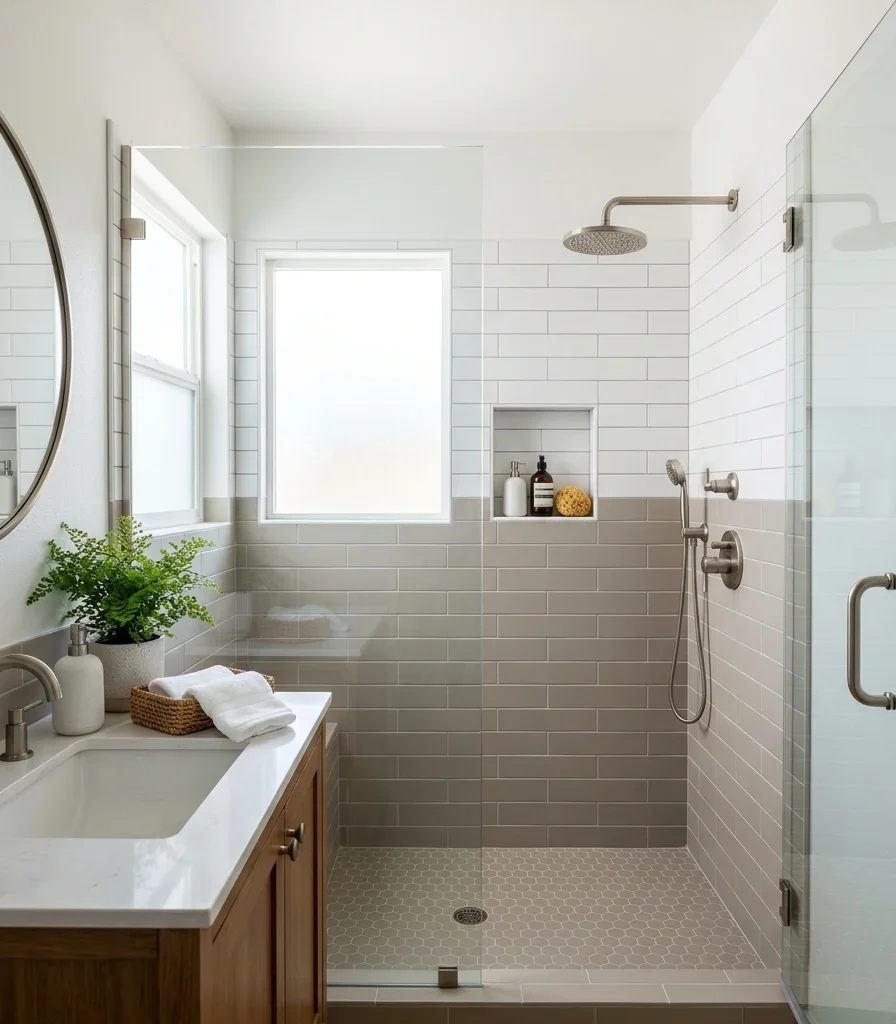
Vibe: Fresh, a two-tone pairing that keeps the shower from reading as a single dense block of color.
Why it works: Tonal layering with a warm greige lower half and crisp white upper half applies a proportion principle, keeping the heavier, more saturated tone low in the room grounds the space, while white above and on the ceiling reflects available light upward, a technique especially valuable in a walk-in shower where the ceiling often sits lower than the rest of the bathroom.
How to get it: Run warm greige tile from the floor to roughly 60 inches, then transition to crisp white for the remaining wall and ceiling, choosing a greige with a subtle warm undertone (avoid cool blue-based greiges, which read colder against white).
Shop the Look
| Product |
| Warm greige porcelain wall tile |
| Crisp white matte ceiling paint |
| Brushed nickel tile trim strip |
| White ceramic soap dispenser |
| Small white bath tumbler |
3. Swap the Door for a Single Frameless Glass Panel
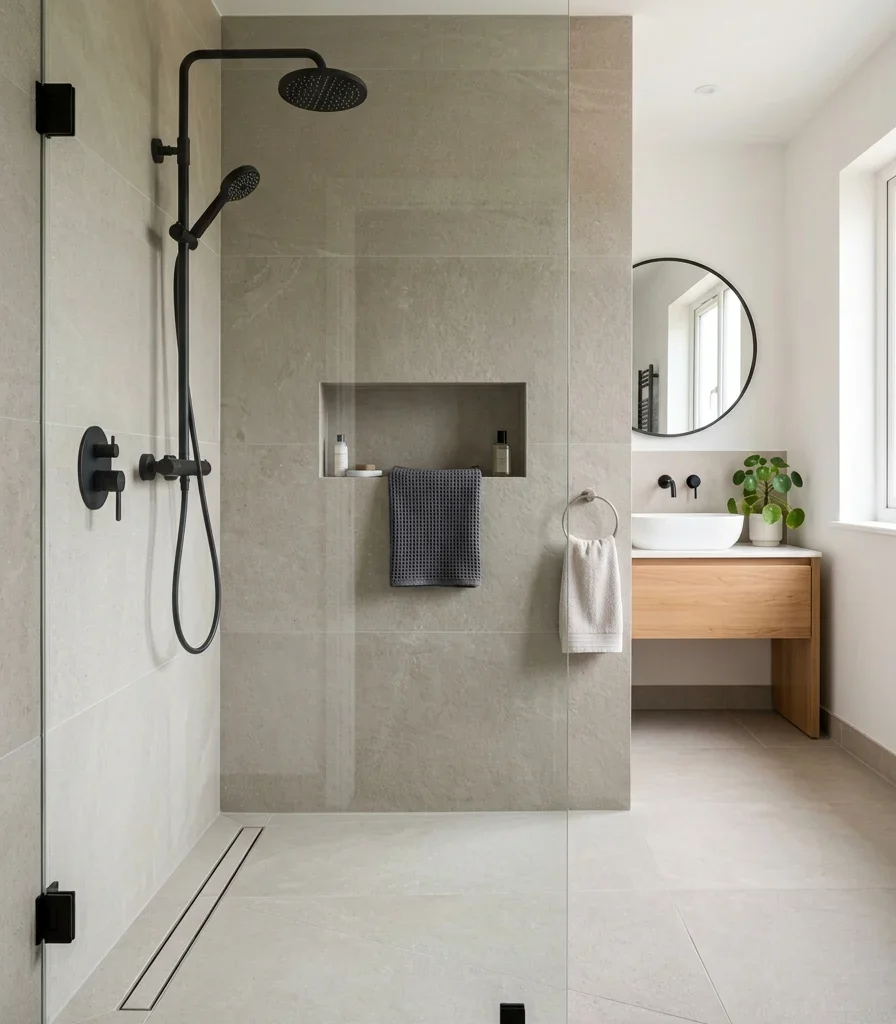
Vibe: Airy, a shower that reads as part of the room rather than a separate boxed-in compartment.
Why it works: A single fixed glass panel instead of a full sliding or hinged enclosure applies negative space and furniture-arrangement principles at once; it blocks splash without requiring the frame, track, and swing clearance a full door demands, which in a small bathroom directly translates into more usable floor space and an uninterrupted sightline from the doorway to the far wall.
How to get it: Install one fixed panel of low-iron (extra-clear) tempered glass, 24–34 inches wide depending on the shower opening, positioned on the side of the shower closest to the vanity or toilet to block the most direct splash zone while leaving the rest of the opening fully clear.
Shop the Look
| Product |
| Fixed frameless low-iron glass panel |
| Matte black glass mounting clip |
| Squeegee wall mount holder |
| Small recessed niche shelf |
| Folded waffle weave towel |
4. Add Recessed Niche Lighting for a Soft Glow
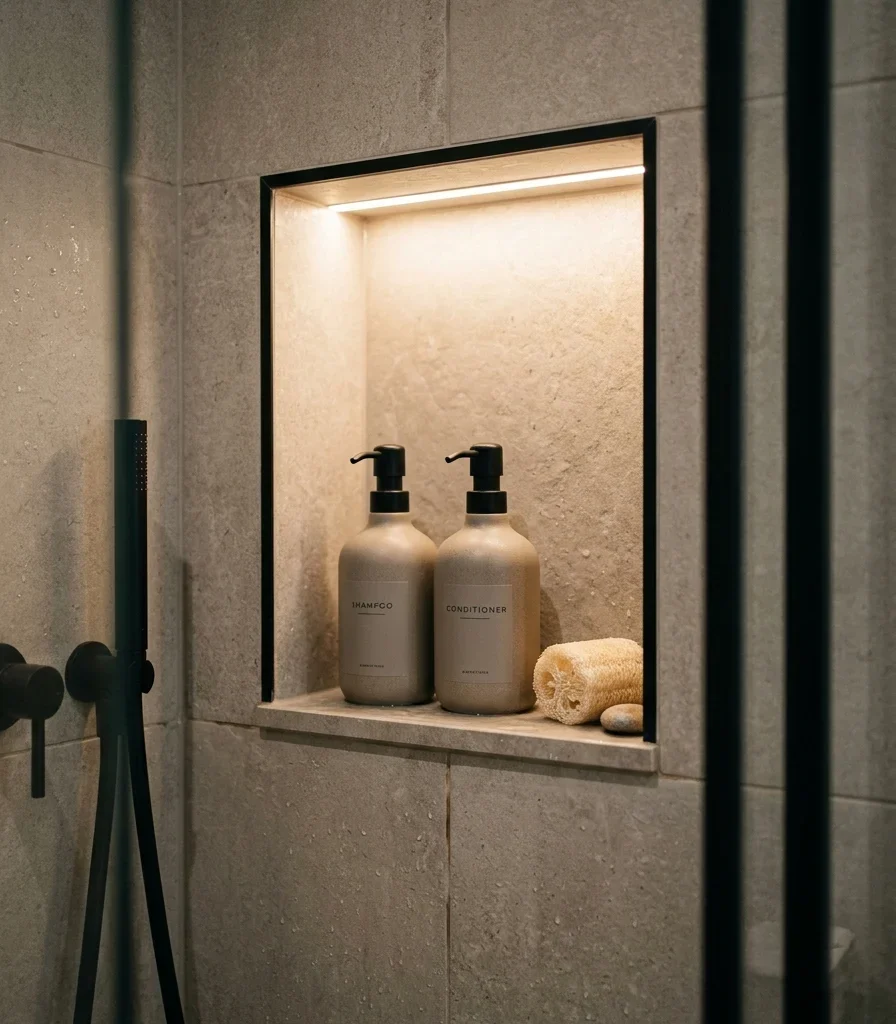
Vibe: Hushed, a soft internal glow that makes the niche feel considered rather than purely functional storage.
Why it works: Recessed niche lighting is a light-layering technique that adds a secondary, lower-intensity light source distinct from the main overhead shower light, which matters in a small bathroom because a single bright ceiling fixture alone can feel harsh in a room with little else to soften it.
How to get it: Install a linear LED strip rated for wet locations along the top interior edge of the niche, using a warm 2700K color temperature to match the room’s other fixtures, and keep the strip recessed behind a small lip so the light source itself stays hidden from direct view.
💡 Quick Win: A battery-powered wet-rated LED puck light under $20 achieves the same soft niche glow without any electrical wiring.
Shop the Look
| Product |
| Wet-rated LED strip light warm white |
| Battery-powered LED puck light |
| Ceramic amenity bottle set |
| Recessed niche shelf insert |
| Small ceramic soap dish |
5. Choose a Textured Pebble or Honed Slate Floor
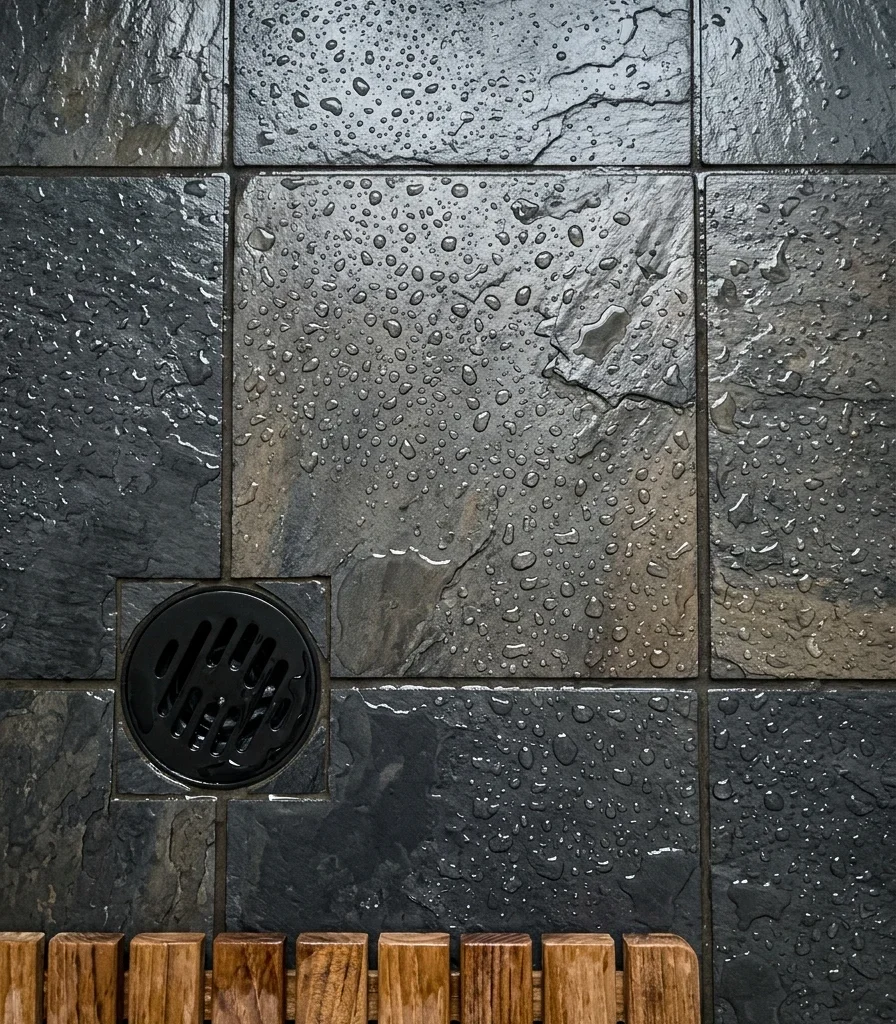
Vibe: Raw, a floor with genuine texture underfoot that also solves the slip-resistance problem a curbless shower creates.
Why it works: A textured floor material like honed slate or pebble tile addresses both a material-honesty and a functional principle simultaneously; the natural surface variation adds visual depth that flat porcelain floor tile lacks, while its texture provides the slip resistance a curbless, water-flush floor genuinely needs since there’s no raised threshold to contain splashing.
How to get it: Choose a honed (not polished) slate or a pebble tile sheet with a minimum slip-resistance rating suitable for wet barefoot use, and keep the color within the same grey family as the wall tile so the floor reads as coordinated rather than a jarring material switch.
Shop the Look
| Product |
| Honed grey slate floor tile |
| Natural pebble tile sheet |
| Matte black linear shower drain |
| Small teak wood bath mat |
| Slate penetrating sealer |
6. Style the Built-In Niche With Ceramic Bottles and a Plant
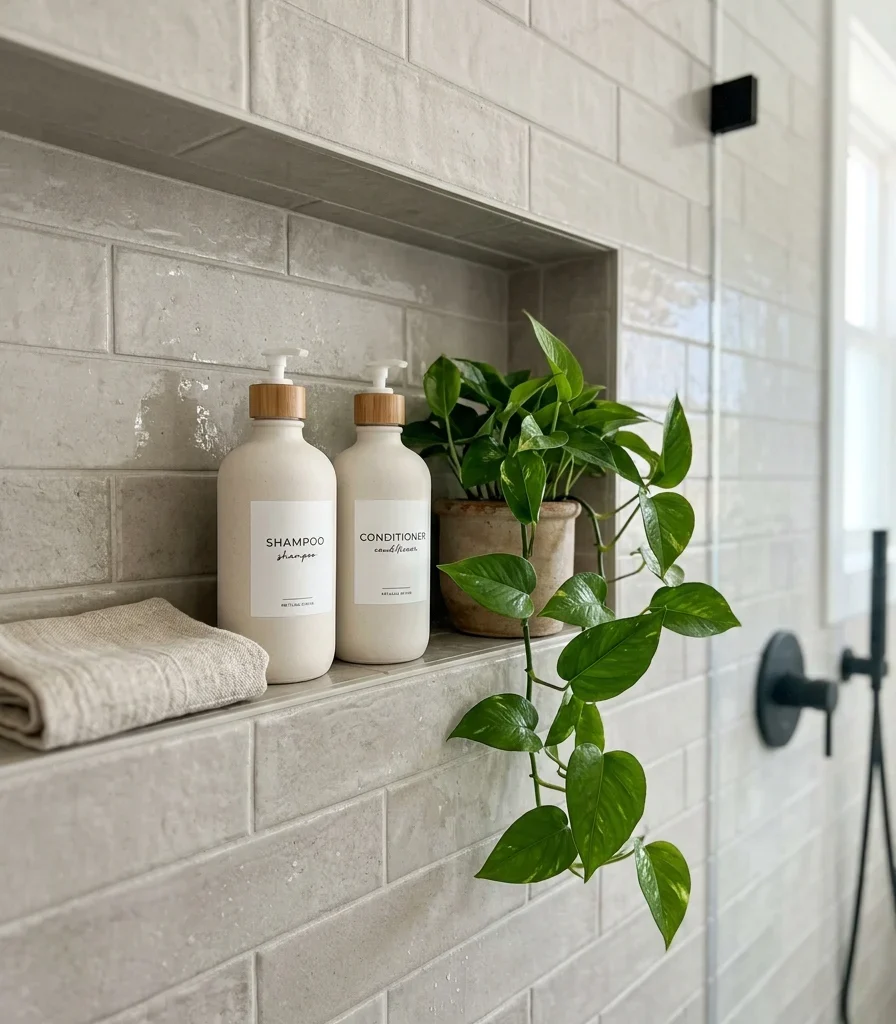
Vibe: Layered, a functional storage spot dressed with just enough personality to feel styled rather than purely utilitarian.
Why it works: Accessory layering applies specifically well inside a niche because the recessed frame already provides a built-in visual boundary; two matching ceramic bottles and one small plant fill that boundary without spilling clutter onto the shower ledge, which keeps a small shower’s limited surface area from feeling crowded.
How to get it: Decant shampoo and conditioner into two matching matte ceramic refillable bottles rather than leaving mismatched plastic packaging visible, and add one small pothos cutting in a ceramic pot with drainage, since pothos tolerates the humidity and low light a shower niche typically provides.
Shop the Look
| Product |
| Matte ceramic refillable bottle set |
| Small ceramic plant pot with drainage |
| Pothos cutting starter plant |
| Folded cotton washcloth |
| Ceramic niche tray insert |
7. Anchor the Room With a Deep Charcoal Accent Wall
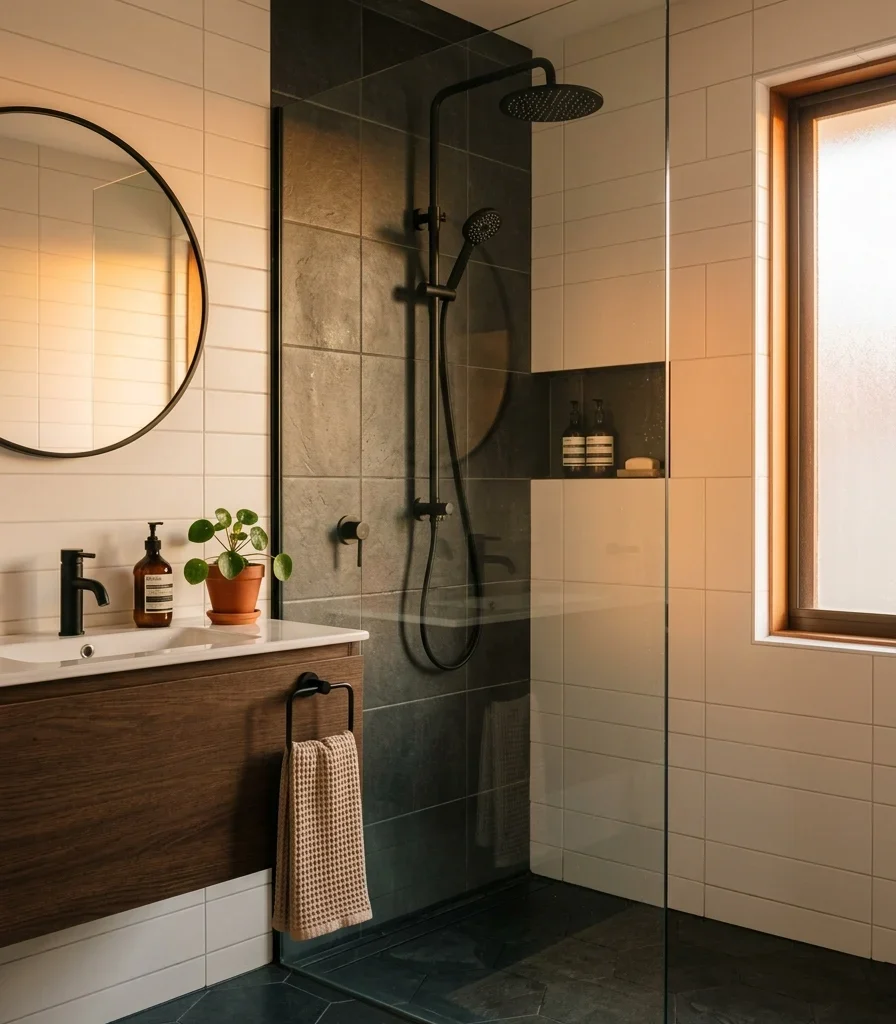
Vibe: Moody, one dark wall that gives the shower a clear focal point without darkening the whole room.
Why it works: Contrast concentrated on a single wall is a visual weight principle that lets a small bathroom introduce a dramatic dark tone without the light-absorbing downside of tiling the entire shower in charcoal. The back wall alone in deep charcoal draws the eye forward while the surrounding white walls keep the room feeling open and bright.
How to get it: Tile only the back wall of the shower (the one visible from the doorway) in deep charcoal large-format porcelain, keeping the two side walls in warm white, and match all shower hardware to matte black so the fixtures read as intentional accents against the dark tile rather than disappearing into it.
💡 Quick Win: Charcoal peel-and-stick tile on the back wall alone achieves the same focal-point effect for renters without permanent tiling.
Shop the Look
| Product |
| Deep charcoal large format tile |
| Peel and stick charcoal tile |
| Matte black shower fixture set |
| Warm white porcelain side tile |
| Matte black towel bar |
8. Add a Built-In Teak Shower Bench
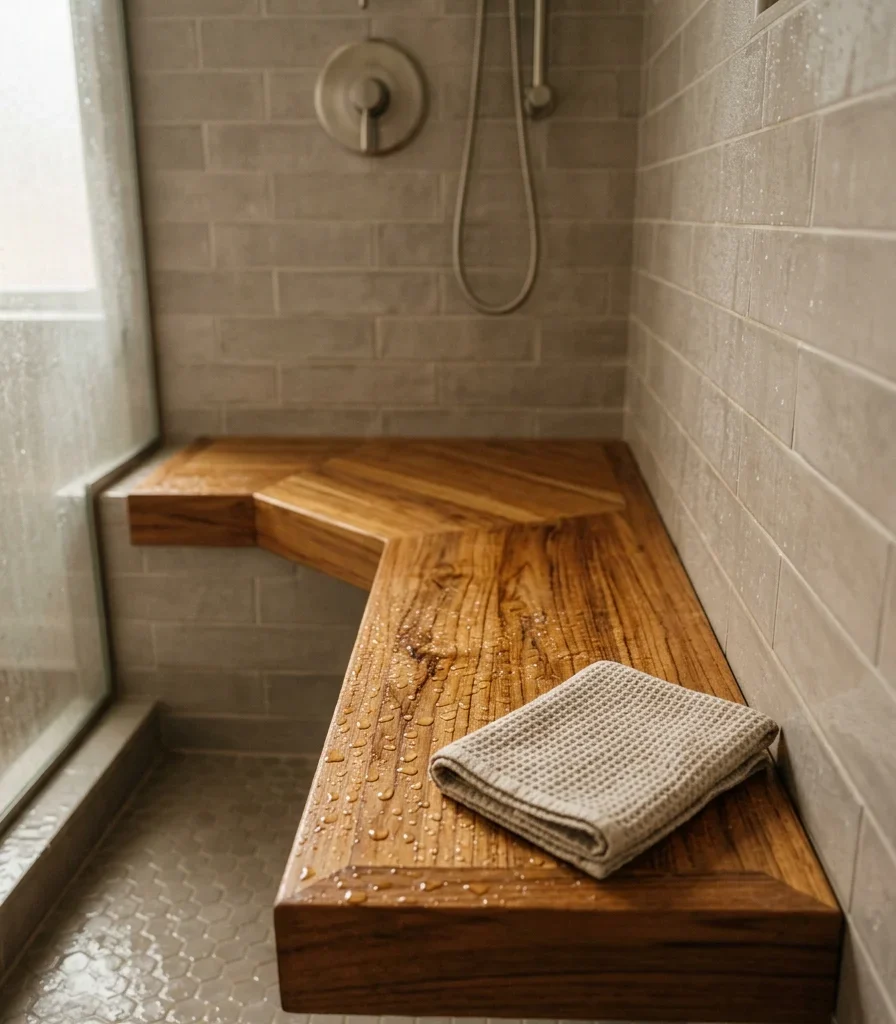
Vibe: Warm wood surface inside an all-tile shower that softens the room without compromising function.
Why it works: A built-in corner bench uses the underused-corner storage principle common in small-space design, applied here to seating rather than storage. A triangular teak bench tucked into one corner adds a functional seat without extending into the shower’s usable standing space, which matters directly in a walk-in shower under 36 square feet.
How to get it: Build or install a teak bench angled at 15 degrees for water runoff, sized to the corner’s actual dimensions rather than a standard rectangular bench, and treat the wood with marine-grade teak oil every few months to maintain its water resistance and warm tone.
Shop the Look
| Product |
| Corner teak shower bench |
| Marine-grade teak oil |
| Folded cotton washcloth |
| Small teak soap tray |
| Matte black grab bar |
9. Borrow Daylight With a Frosted Window
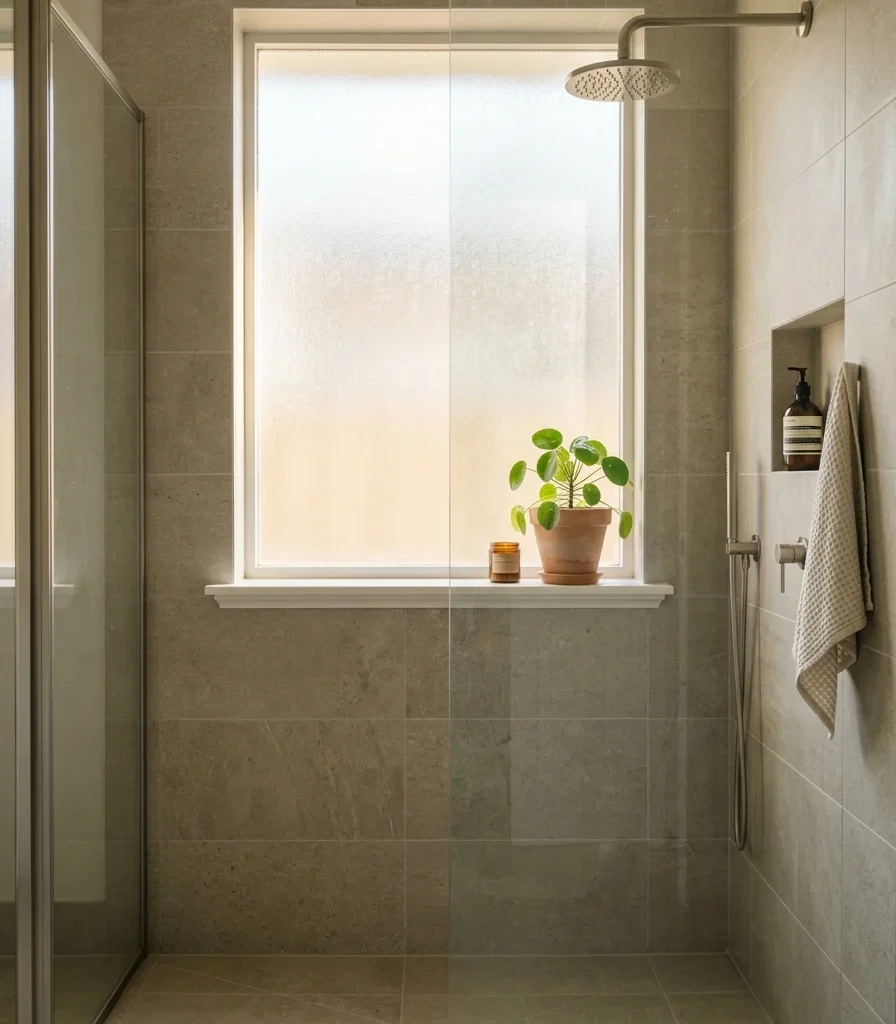
Vibe: Luminous daylight that fills the shower evenly instead of relying entirely on artificial light.
Why it works: Frosted glass diffuses direct sunlight into soft, shadowless daylight, a light-behavior principle particularly valuable for a walk-in shower’s large-format tile. Harsh directional sun can make a slab wall look patchy or overexposed in photographs, while diffused daylight lets the tile’s tone read evenly across the whole surface.
How to get it: Apply an adhesive frosted privacy film to an existing clear window positioned above or beside the shower, and choose a subtle rain-glass texture pattern rather than a fully opaque film so some daylight variation still comes through.
💡 Quick Win: A roll of frosted window film under $25 covers a standard bathroom window in about 20 minutes.
Shop the Look
| Product |
| Adhesive frosted privacy window film |
| Small windowsill ceramic planter |
| Frosted glass pendant fixture |
| Wood windowsill tray |
| Linen hand towel set |
10. Choose Matte Black Hardware Throughout
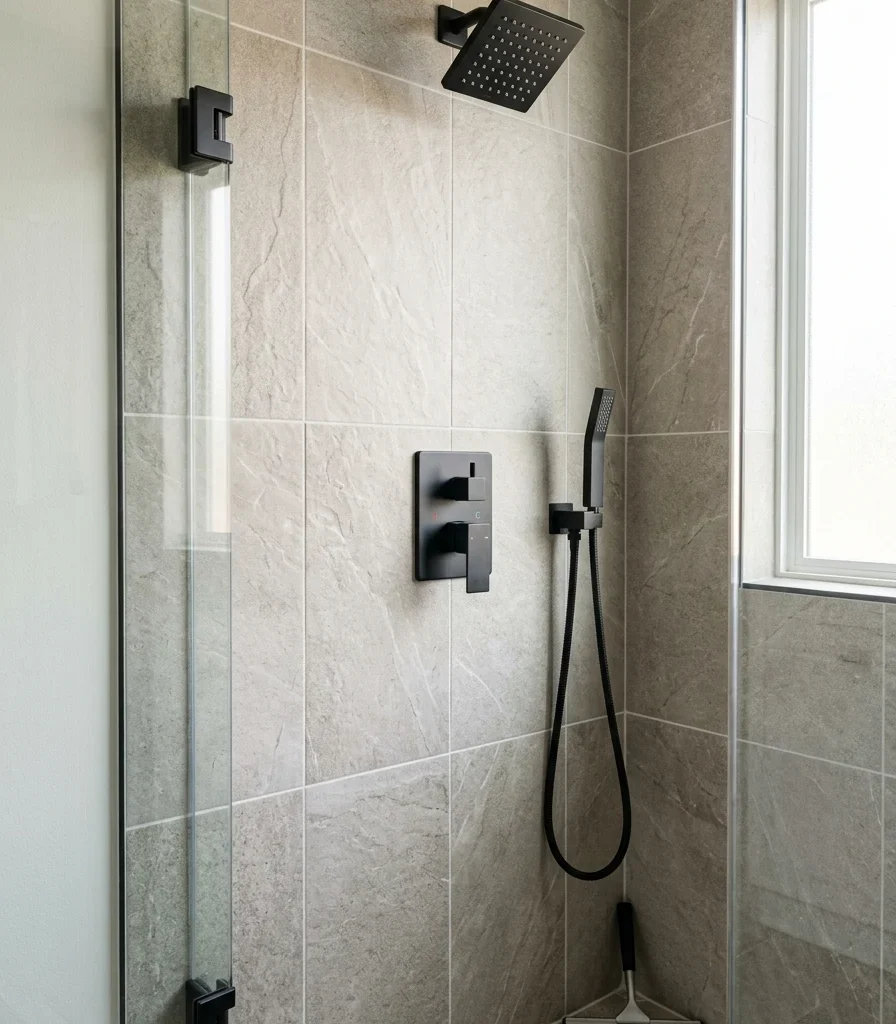
Vibe: Cohesive; every metal surface in the shower is finished identically, so nothing reads as mismatched or leftover from a previous renovation.
Why it works: Hardware finish consistency is a coordination principle that matters more in a walk-in shower than an enclosed one, since an open shower’s fixtures stay visible from the rest of the bathroom at all times. Mixing brushed nickel glass hardware with a chrome shower valve creates visual noise that a single consistent matte black finish eliminates.
How to get it: Replace the shower valve trim, shower head, glass panel clips, and any grab bar or hook with the same matte black finish simultaneously, sourcing all fixtures from finish-matched product lines rather than mixing brands, since “matte black” varies slightly in undertone between manufacturers.
Shop the Look
| Product |
| Matte black shower valve trim kit |
| Matte black rain shower head |
| Matte black glass panel hardware |
| Matte black grab bar |
| Matte black squeegee wall hook |
11. Add a Sage Green Mosaic Accent Band
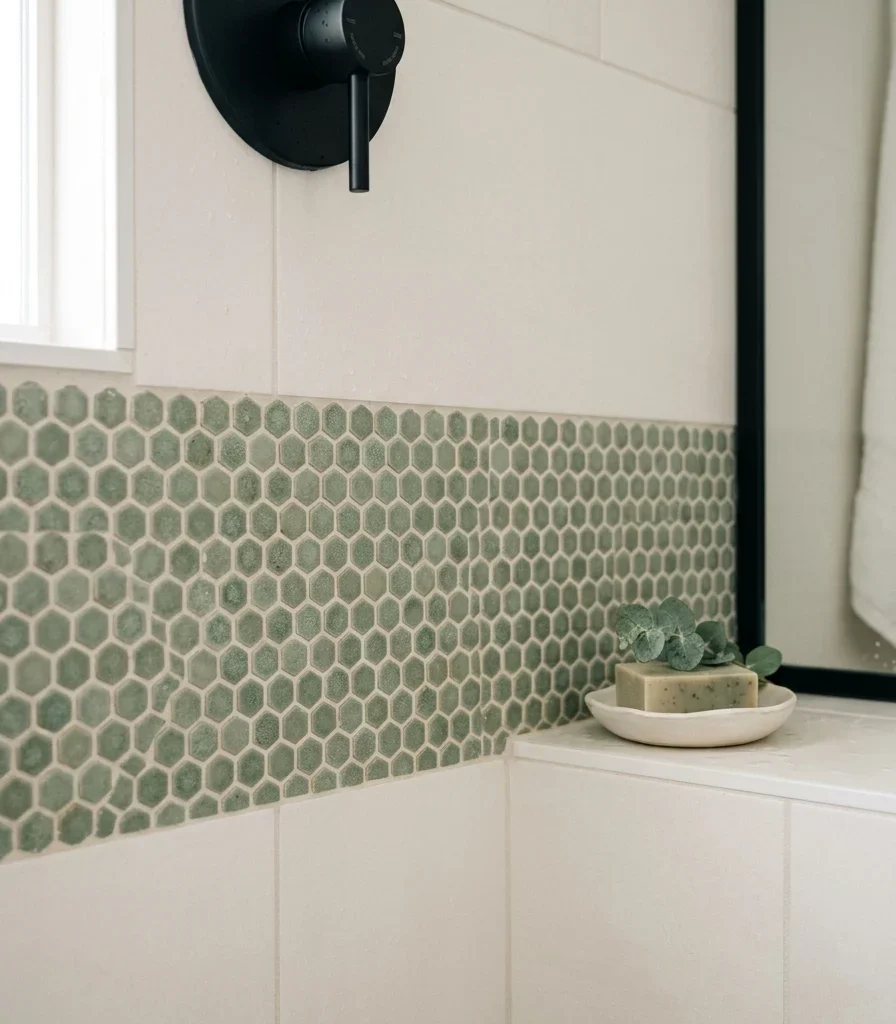
Vibe: Fresh a narrow band of color and texture that breaks up an otherwise all-neutral shower without overwhelming it.
Why it works: A horizontal accent band is a proportion and tonal layering technique that introduces color in a controlled, linear dose. Running a 4- to 6-inch sage green mosaic strip at shoulder height draws the eye across the room horizontally, which can make a narrow shower feel visually wider than a single uninterrupted vertical tile pattern would.
How to get it: Position the mosaic band at 48–54 inches from the floor (roughly shoulder height for most adults), keeping the tile above and below it in the same warm white as the rest of the bathroom so the sage band reads as a deliberate accent line rather than a full color block.
Shop the Look
| Product |
| Sage green mosaic tile sheet |
| Warm white large format tile |
| Tile edge trim strip |
| Small ceramic soap dish sage |
| Sage linen bath accessory set |
12. Layer in a Woven Bath Mat and Linen Towels
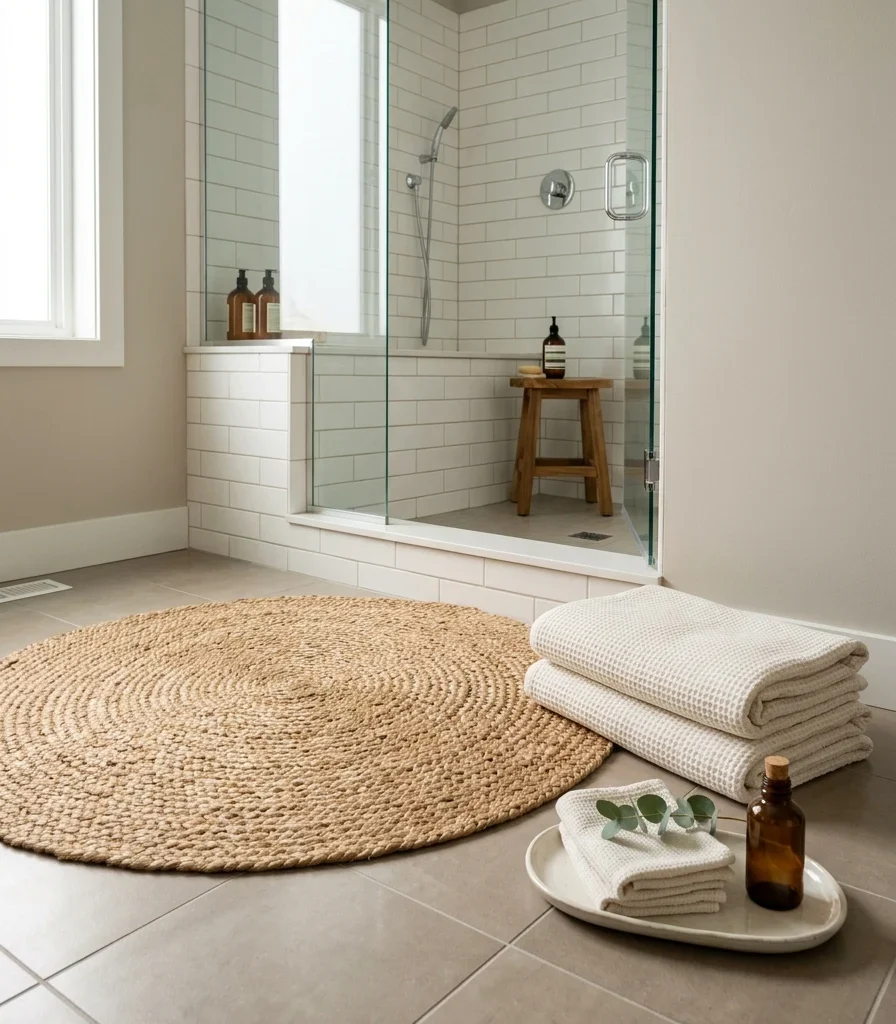
Vibe: Layered soft, natural texture placed right at the transition point where cool tile meets the rest of the room.
Why it works: A woven mat introduces material contrast exactly where a walk-in shower needs it most at the open entry, where hard porcelain or slate meets bare floor; a jute or cotton bath mat provides the tactile softness the surrounding stone and tile can’t, while also visually marking the transition zone in a room that otherwise has no curb to signal it.
How to get it: Choose a low-pile woven jute or cotton bath mat sized to sit just outside the shower’s open threshold, and pair it with warm white linen bath towels folded in thirds on a nearby hook or shelf, since linen’s slightly textured weave coordinates naturally with slate and stone finishes.
Shop the Look
| Product |
| Woven jute bath mat |
| Warm white linen bath towel set |
| Small ceramic tray for washcloth |
| Matte black towel hook |
| Folded linen washcloth |
13. Mount a Fold-Down Teak Shower Seat for Flexibility
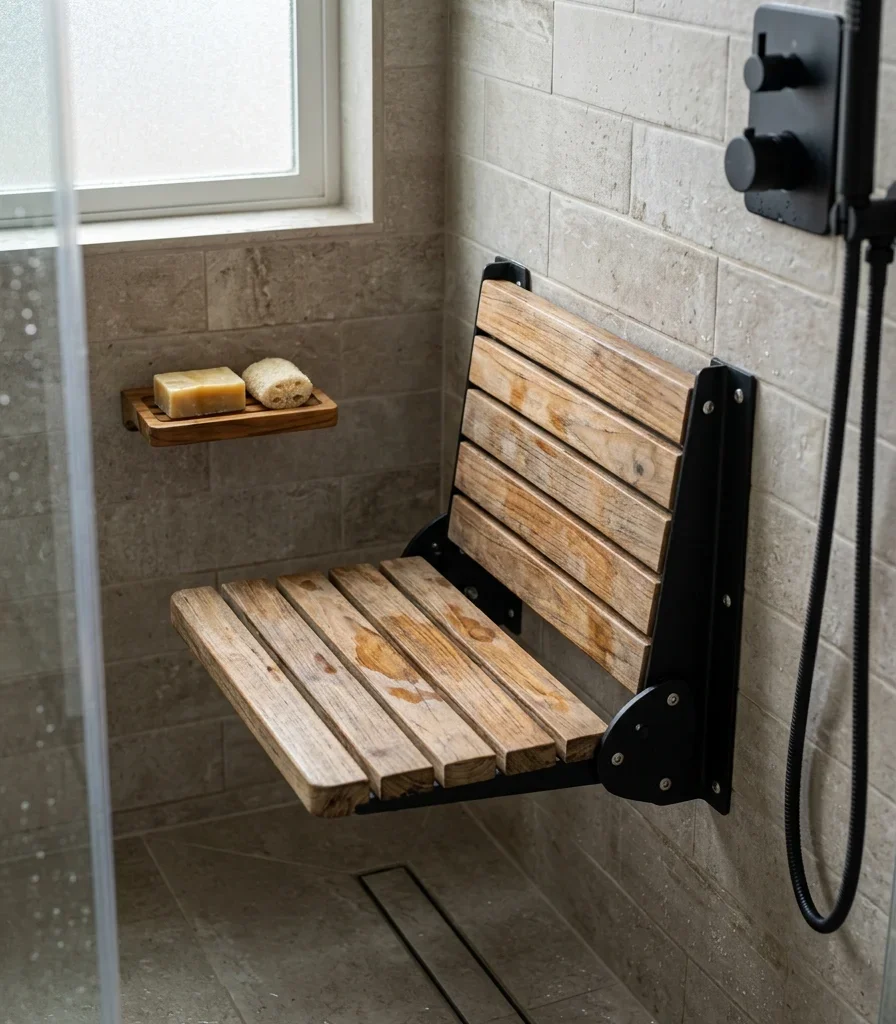
Vibe: Functional: a seat that exists only when needed and folds flush against the wall the rest of the time.
Why it works: A fold-down seat is a dual-function furniture principle distinct from the fixed corner bench covered earlier, where a built-in bench permanently occupies floor space; a fold-down seat reclaims that same footprint when not in use, which matters most in a genuinely tight walk-in shower under 30 square feet where every inch of standing room counts during actual showering.
How to get it: Mount the seat’s hinge bracket at 17–19 inches from the floor (standard seat height) using matte black stainless hardware rated for wet environments, and choose slatted teak rather than a solid seat surface so water drains through rather than pooling on top when folded down.
💡 Quick Win: A tension-mounted teak shower stool that simply sits on the floor avoids any wall-mounting hardware entirely for a renter-friendly version.
Shop the Look
| Product |
| Fold-down teak shower seat |
| Matte black wet-rated hinge kit |
| Freestanding teak shower stool |
| Small teak soap tray |
| Matte black grab bar |
14. Design a Curbless Zero-Threshold Entry
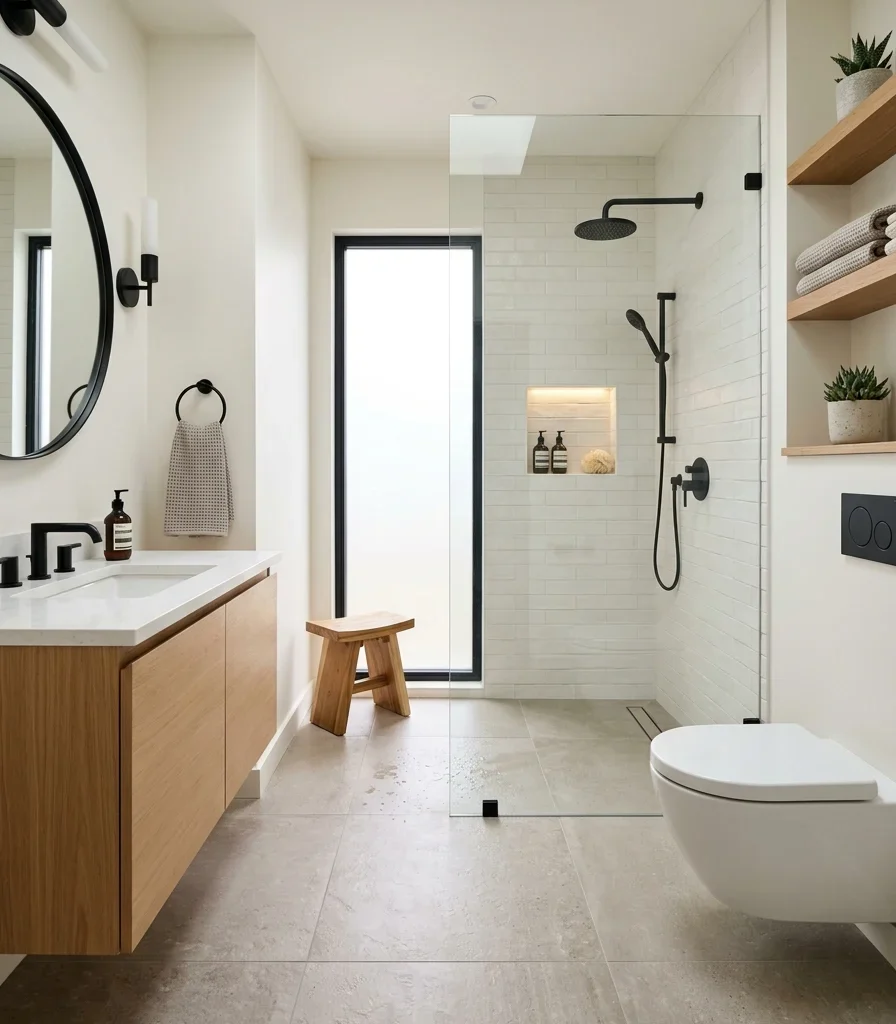
Vibe: Airy, a floor that runs uninterrupted from the vanity straight into the shower with nothing to trip over or visually break the space.
Why it works: Removing the curb entirely is the traffic-flow principle at the core of true walk-in shower design; a raised threshold is the single most common visual interruption in a small bathroom floor plan, and eliminating it lets continuous tile carry the eye (and the actual walking path) across the full room without any perceived boundary.
How to get it: Slope the entire shower and adjacent floor area at a gentle 2% grade toward a linear drain positioned along the shower’s back or side wall, and use the same tile size and color across the whole floor so the curbless transition reads as one continuous surface rather than two zones stitched together.
Shop the Look
| Product |
| Linear floor drain matte black |
| Continuous porcelain floor tile |
| Waterproof floor slope membrane |
| Small teak shower stool |
| Fixed glass panel hardware |
15. Choose a Corner Configuration to Maximize Floor Space
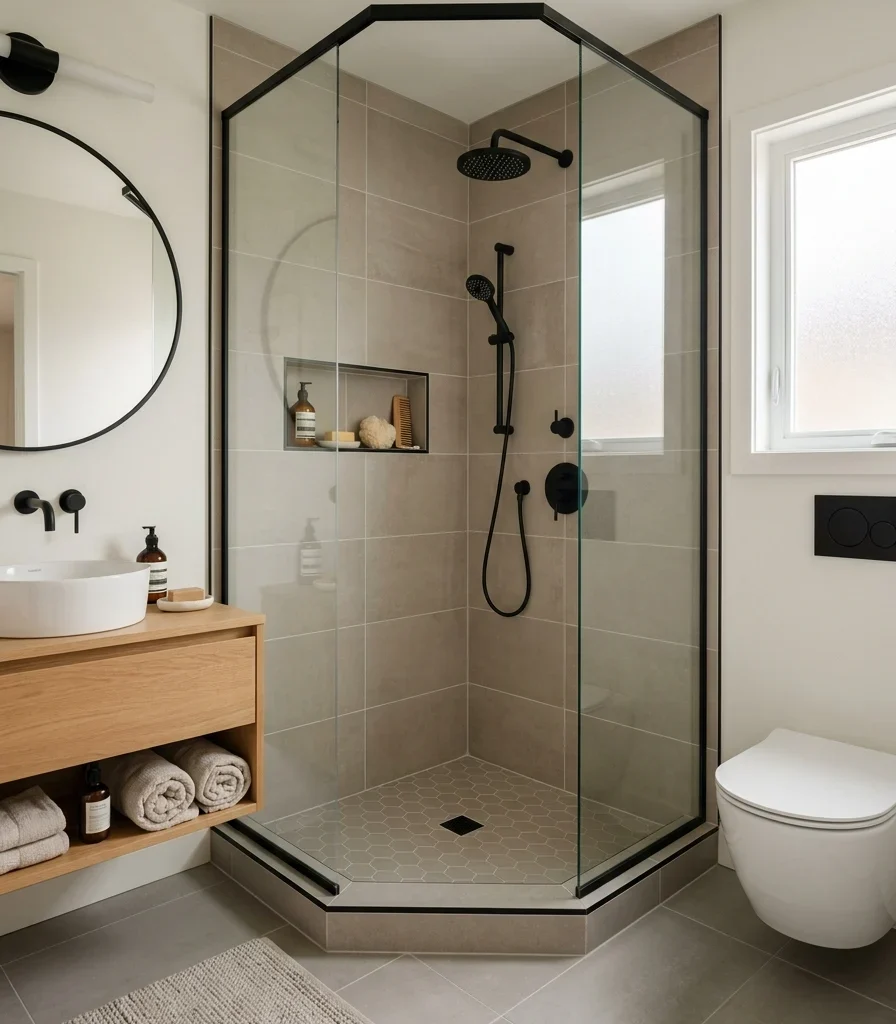
Vibe: Still a shower tucked efficiently into the corner, leaving the rest of the small bathroom genuinely open to move through.
Why it works: In a bathroom under 35 square feet, corner placement is the small-space illusion and adaptation technique that reclaims the most usable floor area. Positioning the shower diagonally across a corner rather than square against two walls uses the room’s least accessible geometry for the shower itself, freeing the more walkable central floor space for the vanity and toilet.
How to get it: Angle a single fixed glass panel diagonally across the corner rather than installing two panels meeting at a 90-degree angle, which requires less total glass and creates a wider, more comfortable entry point than a squared-off corner enclosure.
💡 Quick Win: A neo-angle shower base sized to 36×36 inches fits most small bathroom corners without custom framing.
Shop the Look
| Product |
| Neo-angle corner shower base |
| Diagonal fixed glass panel |
| Matte black corner shower fixtures |
| Small corner niche shelf |
| Continuous floor tile matching set |
How to Start Your Small Bathroom Walk-In Shower Transformation
Your first move is deciding the floor plan before any tile or fixture purchase, specifically, whether the shower will be curbless with continuous flooring or a raised-curb corner configuration. This decision determines the plumbing slope, drain placement, and glass panel size; every other choice in this list depends on it, so it has to be settled before anything else is ordered.
The most common mistake is choosing a full sliding glass enclosure for a bathroom under 40 square feet, which requires door swing or track clearance a small room can’t spare. The fix is specifying a single fixed glass panel instead, which blocks splash just as effectively while leaving the entry fully open and the floor space genuinely usable.
Three items under $50 that create immediate impact: a wet-rated battery-powered LED puck light for the niche, a woven jute bath mat for just outside the entry, and a matte black towel hook set to start coordinating hardware finish.
A weekend refresh hardware swap and lighting costs $150–400. A full walk-in shower renovation with slab tile, a curbless entry, and a fixed glass panel typically runs $6,000–14,000 and takes two to four weeks depending on plumbing changes for the drain relocation.
Frequently Asked Questions About Small Bathroom Walk-In Showers
What is the difference between a walk-in shower and a standard shower stall?
A walk-in shower has no full door or enclosure, often no curb, and relies on a single glass panel or an open entry with continuous flooring. A standard shower stall uses a hinged or sliding door within a framed enclosure and typically sits on a raised curb, which creates the physical and visual boundary a walk-in shower is specifically designed to remove.
What color works best for a small bathroom walk-in shower?
Warm greige or warm white large-format tile works best as the base, since it reflects available light and keeps the open sightline into the shower from feeling visually heavy. A single accent, like a deep charcoal back wall or a narrow sage green mosaic band, adds interest without darkening the whole room the way full saturation would.
How much does a small bathroom walk-in shower cost?
A budget refresh using new hardware and lighting costs $150–500. A mid-range renovation replacing a tub-shower combo with a curbless walk-in shower and large-format tile runs $6,000–10,000, and a full renovation with slab porcelain, a linear drain, and custom glass typically costs $10,000–14,000 depending on whether the drain needs to be relocated.
Can a walk-in shower work in a bathroom with no natural light?
Yes, but lighting layers matter more without daylight. A bright, wet-rated ceiling fixture paired with warm 2700K recessed niche lighting compensates for the absence of a window, and matte black or brushed nickel fixtures read more clearly under artificial light than a fully chrome finish, which can look flat and cold without natural light to soften it.
What is the most important feature in a small bathroom walk-in shower?
The curb decision is the most important single feature, since going curbless with continuous floor tile does more to make a small bathroom feel spacious than any material or color choice that follows it. A properly sloped, curbless entry with a linear drain removes the one physical barrier that most visibly divides a small bathroom into separate, cramped zones.
Ready to Create Your Dream Small Bathroom Walk-In Shower?
These 15 ideas move across material, color, lighting, and true small-space solutions from seamless large-format slab walls and a fixed glass panel to a fold-down teak seat and a corner configuration that frees up the rest of the room. None of this needs to happen all at once, and starting with hardware, a niche light, and a bath mat before committing to a full renovation is genuinely the right way to begin. Today’s specific action: measure your current shower’s curb height and decide whether a curbless, continuous-floor entry is realistic for your bathroom’s plumbing before pricing out anything else. Once that open, uninterrupted floor plan is in place, stepping into the shower will feel less like entering a separate compartment and more like the room simply continuing around you. Save the ideas that fit your bathroom’s real footprint and your plumbing’s real constraints; that matte black hardware and honed slate floor will still feel just as considered a year from now.